I have always been one to lean toward homesteading. The process of growing everything I need to eat and for crafts is such a rewarding way to live, and I get that this is not for everyone. I would love to share that doing things like this is relatively easy and can be started on such a small scale and built upon. It is now February and it is a great time to start thinking about gardening. I have already started buying my seeds to get started. Some need to be started this month. Now it would be a good idea to build a drying box to dry your herbs and flowers. I like the idea of drying herbs by being outside in the heat. I have been researching all the different models that have been made trying to decide which one I like and which will work for my space. I have a very small yard.
Jpeg
As you can see you can make a drying rack out of almost anything and any price range. You can be as creative as you wish. I grow more herbs and flowers than vegetables because of the size of my yard and how much sun I have. In the meantime am focusing on herbs for cooking and for my medicinal cabinet.
I have an electric dehydrator but it cannot handle the volume of herbs I grow. I started with making herbal extracts for cooking and experimenting a bit with medicinal herbs. I hope to expand this year.
Here are more ideas for you for building a drying rack. Some of them are quite small and made with things you can find around your home.
I hope that you find one that you like and start drying herbs and flowers. I would love to see what you do and what you dry on the racks. I hope to experiment with several styles and find places in my tiny yard to do this. Another item is greenhouses. They come in all sizes and shapes. I like to make small ones with picture frames but here are some made from windows.
I am so excited to get started on my garden. I did manage to save some of my herbs in small pots in the house for this season. Good luck and have fun and hope to see your creations for the garden.
A lot is going on in the world and around us locally. If you watch the news every day you could become extremely depressed and possibly afraid. I would not recommend you run out and suddenly become a hard-core Prepper. Instead, I would recommend that you start making steps every day to become more self-sufficient. This is never a bad thing. Many discovered this during the pandemic in 2019. In the city, you can do many self-sufficient things, and get creative. As for me personally am not anywhere near a prepper. But, I do believe in being prepared. Food prices are on the rise and this would be one way to take care of yourself. I initially go into this due to my health. My plan is to grow all my own food organically and then preserve it.
If you are thinking that you might like to do this you should plan on where you are going to have this backup pantry. Do you have enough shelves for the food goods you will be stocking up on? Will you need to build shelves or buy them? Planning is a good idea. You can find unused spaces in your house to store your backup pantry.
You will also need to figure out not only the shelving but what containers you will want to put the extra food in. There are food-grade buckets you can put the bags of beans and rice in. You may start out with only one and that is fine. Just do what you can. I do not recommend you go and buy the store out of any food or supplies. That creates a much larger problem.
Start small by buying an extra bag or two of beans each time you go to the store or a couple of extra cans of vegetables. Do not buy what you will never eat. Think about what you and your family eat regularly and stock accordingly. I would start stocking up for at least an extra 3 months if you can. Build on that if you have the space.
I tried to grow my vegetables but I do not get enough sunlight in my small backyard to do so. Having said this, I have had to get creative on getting fresh vegetables to preserve. I have decided to grow herbs in my yard instead due to having the right conditions to grow them. So I grow herbs for their beauty, cooking, and now medicinal. Each year my herbs grow in numbers. This year in addition to drying them for cooking and teas, I began making all my own extracts. This is actually very easy and fun to do.
I would start by getting jars to make the extracts in. This year I chose pint-size canning jars. We will see how this year goes with our usage on how big of jars I go next year. I also made some stevia extract. I grow it in my yard.
One of the interesting things about stevia is I have harvested it three times this year so far. I am amazed at how prolific this plant is.
I also planted purple coneflower which is echinacea.
So far this year I have made echinacea tincture for medicine. It is best known as an over-the-counter herbal remedy for the common cold or flu. However, it’s also used to treat pain, inflammation, migraines, and other health benefits, such as reduced inflammation, improved immunity, and lower blood sugar levels. Both the plant’s upper parts and roots are used in tablets, tinctures, extracts, and teas.
How to make this. I harvested the plant (enough to fill the jar). I washed the plant to make sure there were no bugs, dust, etc. Make sure that you dry the plant well before you put it in the jar. Once the plant is dry cut it to fit in the size jar you are chosen. Then I fill the jar with Vodka. I make sure the vodka covers all the plant.
You will need
1/2 cup dried echinacea root
1/2 cup dried whole echinacea flowers and or leaves
1 1/2 cups of 80-proof vodka
I used fresh plants and flowers and I added a cinnamon stick to the tincture to help the flavor. Once you have the ingredients in the jar cover with the lid and shake. Label the jar with the plant name, date, and alcohol used. Let it sit in the jar for 4-6 weeks and then strain the plant out of the mixture. This is when you put the strained liquid into dropper bottles and then label them.
This tincture can last for 4 – 6 years. As for the dosage if you are going to use it.
1tsp 2 or 3 times per day. Take this when you first feel the cold or flu coming on. You can put this directly in your mouth and followed by a drink of water, or you can mix it into a cup of tea. Take this until you are feeling better.
The other herbals I created are extracts for cooking. Here is the list of extracts that I made so far.
Chocolate Mint – I used fresh plants, wash, dried, took the leaves off the stems, and then pushed them down and filled the jar. Leave the herbs in the vodka for at least 6 weeks for the flavor to be fully extracted. Gently shake every 2-3 days. Be sure to store them in a cool, dry place away from sunlight.
Apple Mint – I used fresh plants, wash, dried, took the leaves off the stems, and then pushed them down and filled the jar. Leave the herbs in the vodka for at least 6 weeks for the flavor to be fully extracted. Gently shake every 2-3 days. Be sure to store them in a cool, dry place away from sunlight.
Orange Mint – I used fresh plants, wash, dried, took the leaves off the stems, and then pushed them down and filled the jar. Leave the herbs in the vodka for at least 6 weeks for the flavor to be fully extracted. Gently shake every 2-3 days. Be sure to store them in a cool, dry place away from sunlight.
Peppermint – I used fresh plants, wash, dried, took the leaves off the stems, and then pushed them down and filled the jar. Leave the herbs in the vodka for at least 6 weeks for the flavor to be fully extracted. Gently shake every 2-3 days. Be sure to store them in a cool, dry place away from sunlight.
Cinnamon – I used cinnamon sticks. I have 4 or 5 sticks that I broke in half and put in the vodka. Leave the cinnamon in the vodka for at least 6 weeks for the flavor to be fully extracted. Gently shake every 2-3 days. Be sure to store them in a cool, dry place away from sunlight.
Lemon – I cut the skins off 4 lemons and tried not to get any of the pith. That is the white spongy substance you see when you peel the lemon. Put the skins in the jar with vodka. Leave the lemon in the vodka for at least 6 weeks for the flavor to be fully extracted. Gently shake every 2-3 days. Be sure to store them in a cool, dry place away from sunlight.
Orange – I cut 2 oranges and used the skins. That is the white spongy substance you see when you peel the orange. Put the skins in the jar with vodka. Leave the orange in the vodka for at least 6 weeks for the flavor to be fully extracted. Gently shake every 2-3 days. Be sure to store them in a cool, dry place away from sunlight.
I also made Rosemary oil, 2 jars of them. One for cooking and the other for my hair. The Rosemary oil is to thicken up my hair. Gently shake every 2-3 days. Be sure to store them in a cool, dry place away from sunlight.
Vanilla – I used 4 to 5 whole Madagascar vanilla bean pods. For this, I tried Spiced Rum. Yum, this turned out great. I need to make more bottles of this. Put the vanilla pods in the jar with vodka, or spiced rum. Leave the vanilla pods in the vodka/rum for at least 6 weeks for the flavor to be fully extracted. Gently shake every 2-3 days. Be sure to store them in a cool, dry place away from sunlight. Vanilla beans can be used 4 or 5 times before they lose their potency.
Almonds – 1/2 cup of raw unsalted slivered almonds. Put in the jar of vodka and seal. Gently shake every 2-3 days. Be sure to store them in a cool, dry place away from sunlight.
Coconut – 1/2 cup of roughly chopped coconut. Put in the jar of vodka and seal. Gently shake every 2-3 days. Be sure to store them in a cool, dry place away from sunlight.
Have fun and try creating these extracts and find new ones. I would love to hear if you tried any of these! Pictures also!
Whether you have a backyard or just a tiny patio creating color is easy to do. The easiest way to do this is with plants. For me, flowers bring such joy to see and be around. The second way is through painting flower pots colors or doing artwork on them, the list is endless. You do not need to be an artist either. I will show you several ideas that you can do.
I painted these flower pots white first. I printed out the pictures from the pictures I found online. I used Modpodge to put the artwork on the flower pots and once they were dry, I did a wash of a darker color to make them look old.
This group of pots was painted white and then the tops were wrapped in jute. It is quick and easy to do this style of a flower pot. I used acrylic paint.
This group of pots is done in acrylic paints and sealed with ModPodge. For the smaller pots, I did the artwork with permanent markers and then sealed them. Note: I would use an outdoor sealer to protect the flower pots. ModPodge tends to stick when it gets wet and the paint starts to peel off.
Obviously not the best picture. I painted the flower pot a sage color acrylic paint and then drew the flower on with glow-in-the-dark paint. It is a great idea but it only glows for about an hour after the sun goes down. Still on the lookout for good glow-in-the-dark paint.
This group of flower pots I painted with blue outdoor paint. Followed by permanent marker artwork. It will be sealed with an outdoor sealer as well. It is late in the season, but I would love to do a batch of flower pots out of cement. I try to come up with different ideas every spring. Have fun and be colorful. I look forward to seeing what you come up with.
This year I decided to grow more herbs. I just do not have a big enough yard with enough sun to grow tons of vegetables (darn it!) Herbs are so easy to grow. What I started with this year was cooking herbs. I plan to add medicinal herbs next summer. To start I had to focus on what herbs that I like to cook with. Why grow what you will not use. Since this was my first year of growing herbs with the intent to use and store for cooking I had to plan out what herbs to buy. Here is the list I started with.
Shiso (Asian Perilla)
German Thyme
Lemon Thyme
Sage
Pineapple Sage
Sweet Basil
Stevia
Greek Oregano
Italian Oregano
Sweet Mint
Ginger Mint
Apple Mint
Chocolate Mint
Peppermint
Spearmint
Mojito Mint
Rosemary
Lemon Balm
Dill
Shiso (Asian Prilla)
Curly Parsley
I will be adding to this next year for sure. The key thing is to prune your herbs often to make them bushier. You should prune in the mornings after the dew, if any is off the plants.
I saved all kinds of jars to put the herbs in. I prefer mason jars for storing all the food stuff. To start when I started harvesting I would do only what I could fill in the dehydrator. I wash the herbs because there was also fires near by this last summer and I was finding some ash on the plants still. I do not use pesticides on my herbs either.
I laid the herbs out to dry and then I would cut all the leaves off before dehydrating.
I should have taken more pictures of the herbs in the dehydrator. (Next year :)) I do not crush the leaves when I put them in the jars. I crush them at the time of use.
Depending on how much we use of these herbs will determine how many plants of each I buy next year. I also took cuttings from many of the herbs and I am trying to see if I can winter over some of them for next year. The dill, I let some of it go to seed and saved the seeds. I have a collection of my own seeds that I have started also.
In addition to growing herbs, I love to propagate plants and collect seeds.
PAINTED PUMPKINS
Here is a quick and easy project. Paint clay flower pots upside down and turn them into cute pumpkins. I sealed the pots first with water sealer. Painted them and then sealed them.
Pick as many sizes as you want, find interesting places to place them. Great Dollar Store project.
I love greenhouses, any size. The more creative, the more I love them. Upcycling is where I try to make something out of something else. My current yard is not big enough for a full size greenhouse. I would love to have a 40 foot greenhouse where I could grow things year round. This summer I want to find some windows to build a small greenhouse. Until I get to that project I decided to try an even smaller greenhouse. I was inspired by Pinterest. I love how they came out and plan to make more and make changes to make them even more my own style.
Materials you will need:
You will need 6 picture frames. (I bought mine at the Dollar Store)
Laser cut frame (I bought this at Hobby Lobby, sometimes they have them at the Dollar Store.)
E6000 glue
glue gun
paint (color of your choice.)
water sealer (if you are putting it on the patio)
Box cutter
Laser cut frame
6 frames the same size
Take the glass out of the frames
You will take the frames glass out and the little black things that hold the glass in the frames. Set the glass aside for now. The rest you can throw away unless you can think of another project to use them for. Once you have all the frames without glass you can gently sand the frames and then I painted it with color of paint of your choice. I used chalk paint.
Once the paint is dry I antiqued the frames. There is several ways to do this. I used Burnt Umber acrylic paint. One greenhouse I dry brushed it on and wiped off what I did not like. The second greenhouse I did I just watered down the paint to a water color and painted it on and wiped off what I did not want.
Once you start constructing your greenhouse you will want to reinforce the roof. To do this you will glue first with E6000 and then with the glue gun. The reason for this is so the glue gun glue will hole the pieces together until the E6000 dries. You will glue a dowel on the inside of the roof and let it dry.
You will be gluing the glass back into the frames. It is not the neatest job to do this. I used both glues to do this. I did all 6 windows at this point. You will want to give this some time to set before continuing because you will be handling this greenhouse a great deal.
glue sides together, the roof has a dowel at the peak
If you do not use the dowel the roof will not stay together.
You will glue the top side of one frame to the side of another (see example). Until you have all four sides glued.
At this point once everything has dried and the glues are all set you will want to go around the roof and make sure the roof is glued to the house anywhere they are touching.
Now this laser cut from is made from balsa wood and easy to break. You will want to measure where you want to put this on the house (or not at all if you want). To cut this use an Box cutter, anything else will just break it to pieces. This will need to be painted and antiqued like the rest of the house. As you can see I put one at each end of the house.
There is no bottom to the greenhouse. You just set this over the top of what every you want to display.
Very easy to make this and if it is glued together well it will be very sturdy.
As you can see each one is unique and you are only limited by the size of the frames. The small greenhouse is with wider frames and came out just a nice. It is made exactly in the same way that the larger one was.
I hope that you try these out. I made an extra one for my mother for Mother’s Day. She loved it.
I have always liked collecting seeds, buying seeds, and planting them. It is the greatest joy to watch the little seed pop through the soil and grow into large plants. I must admit I am not always successful in growing seeds, but I keep trying. I love the smell of freshly turned soil, getting my hands dirty and just playing in the garden. I did try to teach my daughters how to grow plants but for some reason, despite my best efforts neither of them really are that interested in plants. It amazes me how determined seeds are. They can grow under some of the harshest conditions and survive.
It is not to soon to be thinking about this years seed collection for your garden. Many gardeners have been doing this for years. Not only is this a great idea it also is very sustainable and saves you money. It does not matter if you are a beginner or experienced gardener gardening for years, this is such a good idea.
This is a fabulous activity to do with your children. They will get to learn about where their food comes from, and how to grow it, and about saving seeds. It might even encourage them to grow a few things for themselves and start their own seed library for their future gardens. Maybe even together create the seed envelopes with their art work. You could even go so far as starting a seed sharing group and build your own seed library.
Saving seeds is something that does take a little planning and organizing. In the spring is when you want to think about what seeds to order online and which you want to plant. What seeds you want to save. What kind of container to save them in and so on. So here are a few on my tips for you on saving seeds.
What you want to do if you plan on saving your seeds from year to year is invest in
Heirloom and open-pollinated (not from hybrid plants)
Annuals
Not cross-pollinated
Fully ripe and from healthy plants
Seed envelopes
Or containers such as spice jars
labels
Heirloom seeds will reproduce true to type as long as you did not plant them to close to other varieties. They might cross-pollinate and you really do not want that to happen. If you use hybrid plants to collect seeds you will have an unpredictable out come with the next season of plants. I believe that saving seeds takes your gardening to the next level.
Where to find these seeds you might ask. Some of the local nurseries may carry them but you might have more luck buying your seeds on line to start your garden and then collect your seeds. One source is “Seeds Now“. This is a good place for a beginner learning about seeds and collecting seeds. The website is very informative. You can also buy some heirloom from Burpee Seeds. Some are sold at Home Depot. I am starting my own very large collection of heirlooms.
Now that you have bought your seeds and planted them do not forget to collect the seeds 🙂 I have done that. Your next question is now what do I do with them until next season.
You will want to save the best looking plants to save seeds from. The process is to make sure you collect enough of each plant. Be sure to wash the seeds to make sure there is nothing on the seeds. Then lay them out on a tray to dry. This can take up to several weeks. You might want to flip them over periodically so they dry completely. You want to make sure that you dry them completely so that they do not rot.
One of my suggestions is to put them into paper envelopes to store them. Be sure to include all the information about the seed on the package. (photos from Pinterest)
Another idea is to put the seed packets in pockets in a notebook. (pictures from Pinterest) Or save them in your old spice jars. Get creative and find what works best for you. Love to see some of your ideas.
(Pictures from Pinterest) The notebook version is a good idea and handy to get to the seeds. I like the idea of using jars also. The jars with the corks on the top can be found at Hobby Lobby. The wooden box can also be found at Hobby Lobby on occasion. You might need to get creative on how to raise them up.
I am fond of this one. You can use the original seed package or one that you print out or make yourself.
Here is another idea to catalog all your beautiful seeds. This truly keep things organized and make planting season so much less stressful.
Again I love jars. These jars are from store bough spices. You many also find them at Hobby Lobby. What ever you choose it will be grand. I know you will be successful.
Another thought is to join a seed exchange group in your local area. If there is none, start one. Have fun, Learn, Share!
I have gardened for years. In all the years I have gardened, it never crossed my mind to keep a gardening book. Why keep a garden journal you may ask? I asked myself this same question. In my research, I decided that I needed to make a garden journal to help me keep track of what I planted, particularly the perennials and bulbs, and any problems I came upon as the season progressed. As I am an artist, I decided to sketch out my garden journal. If you have not heard this before, sketching is very therapeutic. You do not need to be a fantastic artist. This book is for you, by you. You can also buy ready-made garden journals if that is more to your liking.
When to plant vegetables
You could use a sketchbook to create beautiful artwork to go along with your notes. A three-ring binder with dividers is another way. There are a variety of places on the internet to get downloadable pages you can add to your notebook. There are a plethora of garden planning apps for your phone available on your phone’s app store. You can have all the information at your fingertips while in the garden. I am testing several of the apps out to see which one feels best for me to use.
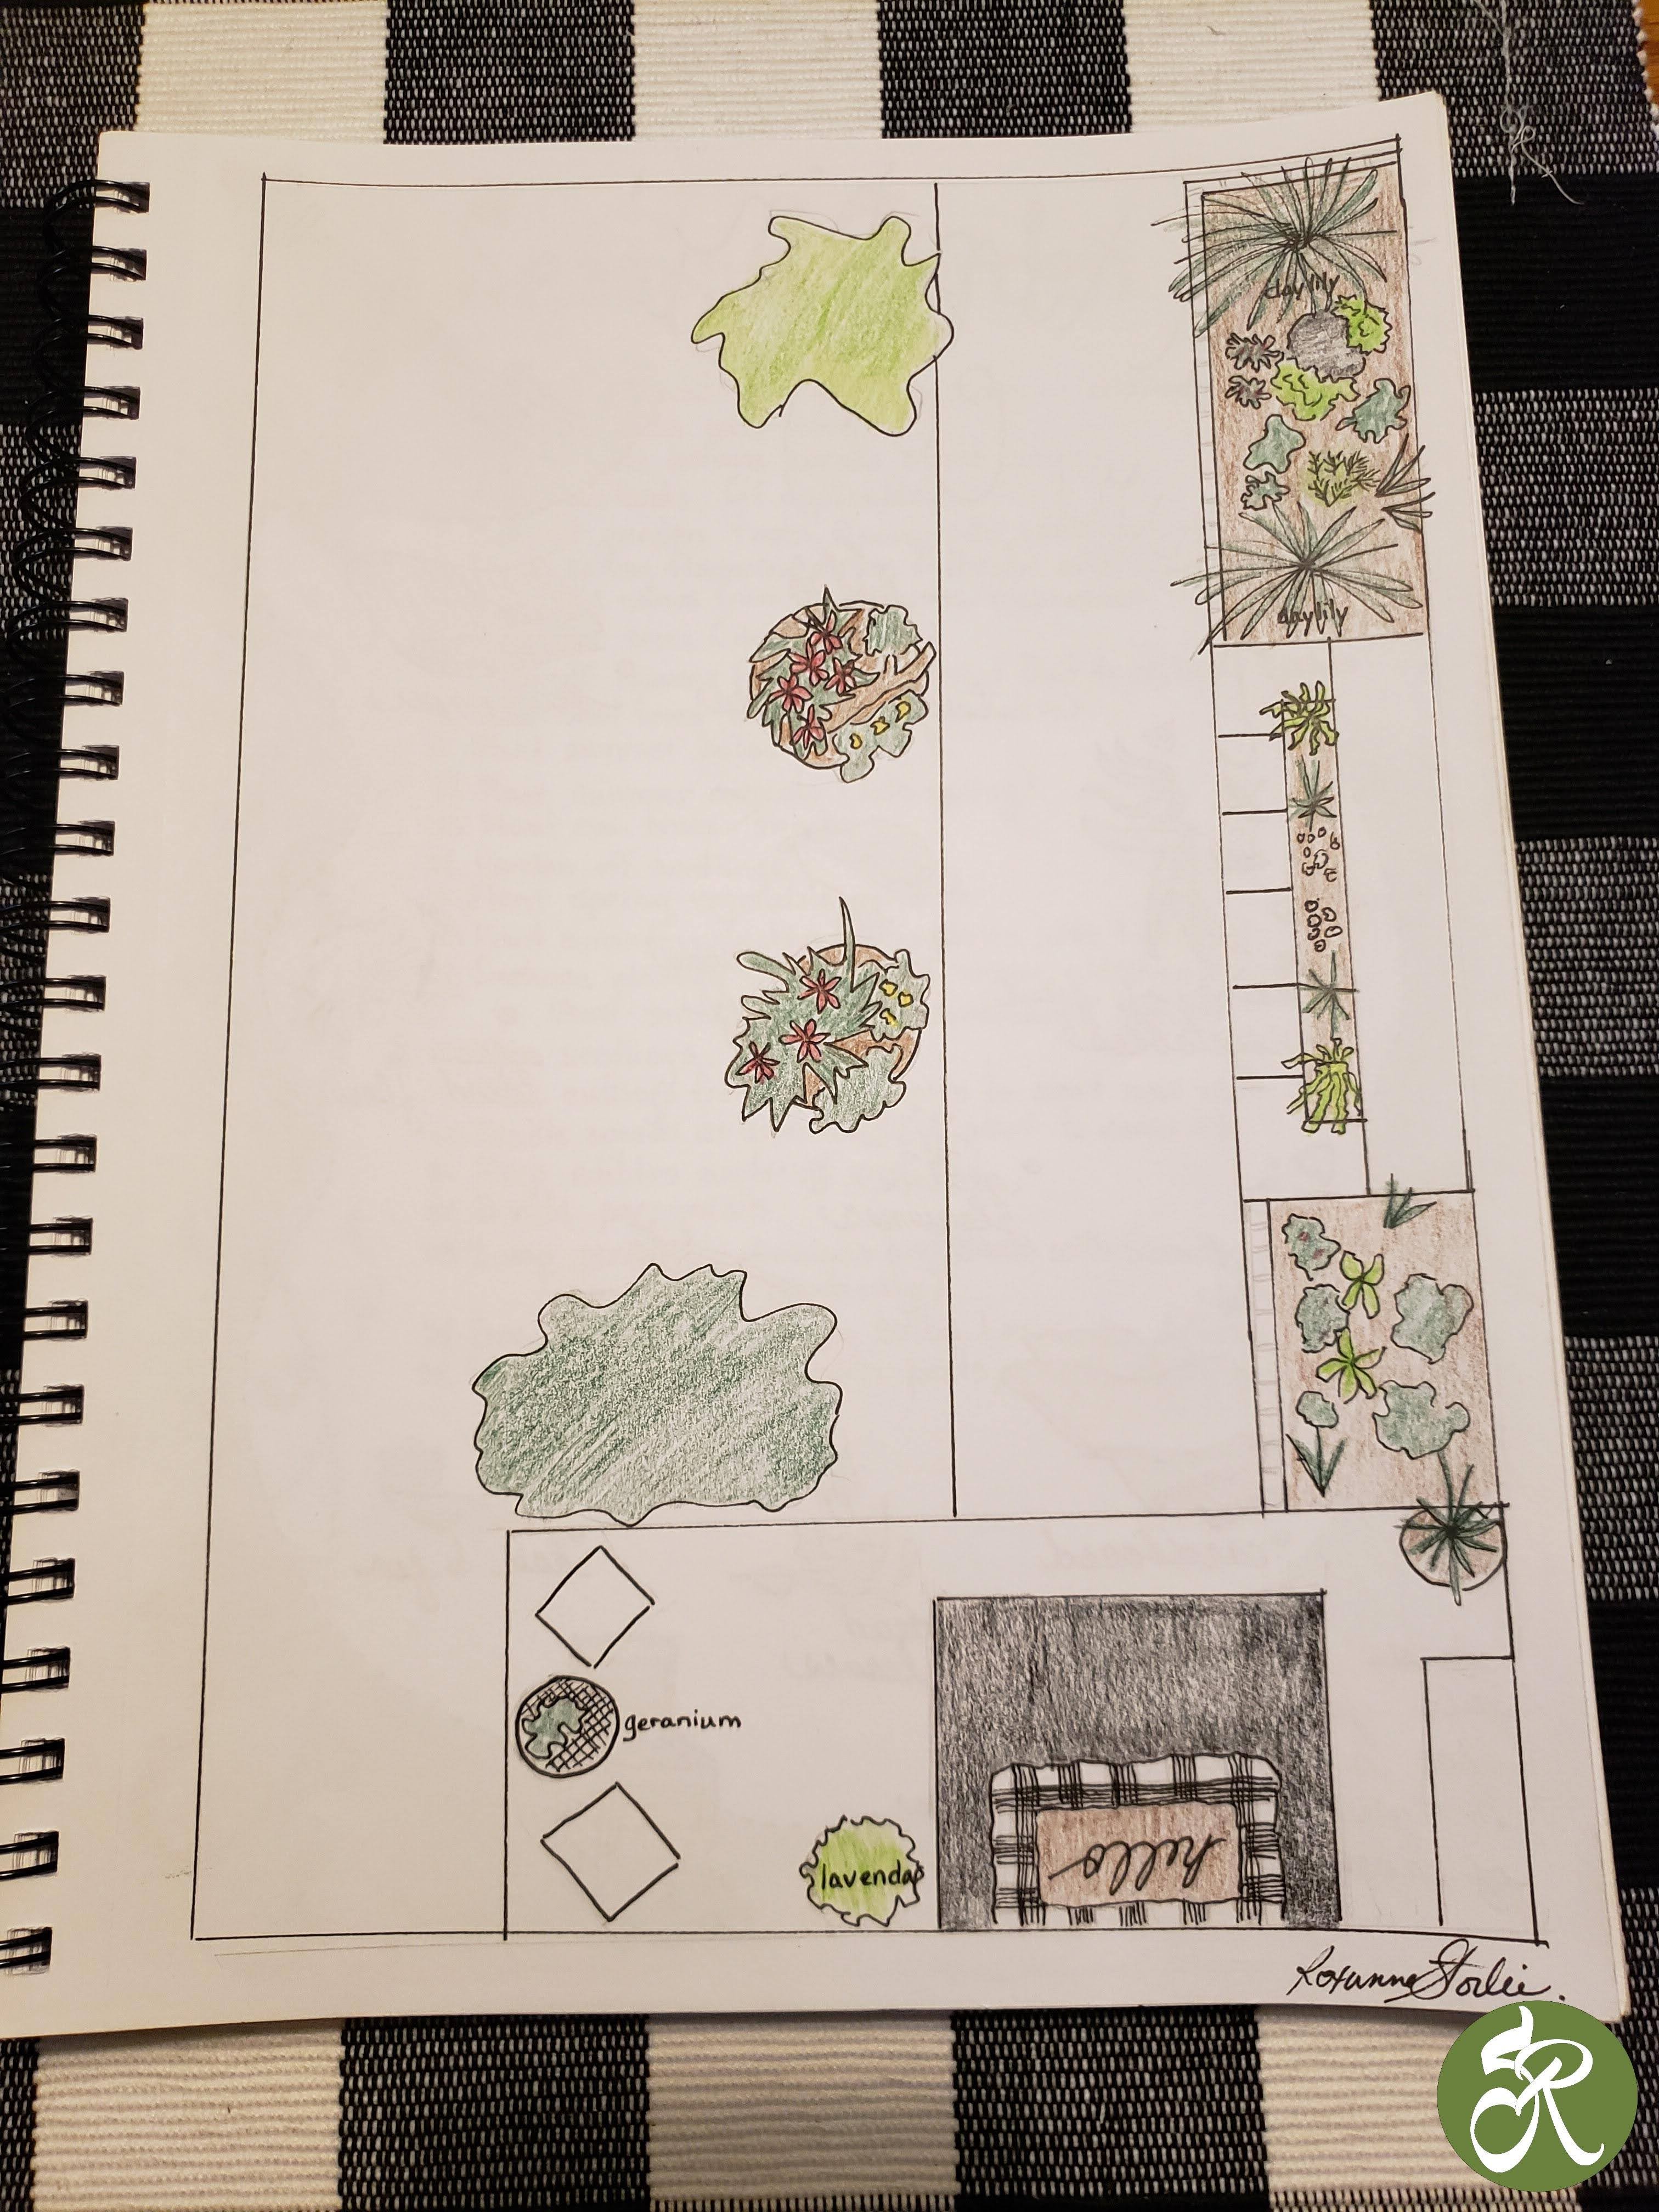
Sketch of my patio garden
The sketch garden book I am creating is my reference journal if you will. I am putting in a list of plants that I planted. I added in the journal about plant diseases I should look for. It is has become a great place to keep track of the insect and diseases that have developed this year, so I can plan for next year’s plants and be proactive about how to deal with them. By being observant and keeping a garden journal, you will discover:
Sketch of the front walkway to my house
What grows well and what does not. If I grow a plant that the books say should do well and it does not, I want to know why. As I am recording my successes and failures during the season, I have a better place to start next year.
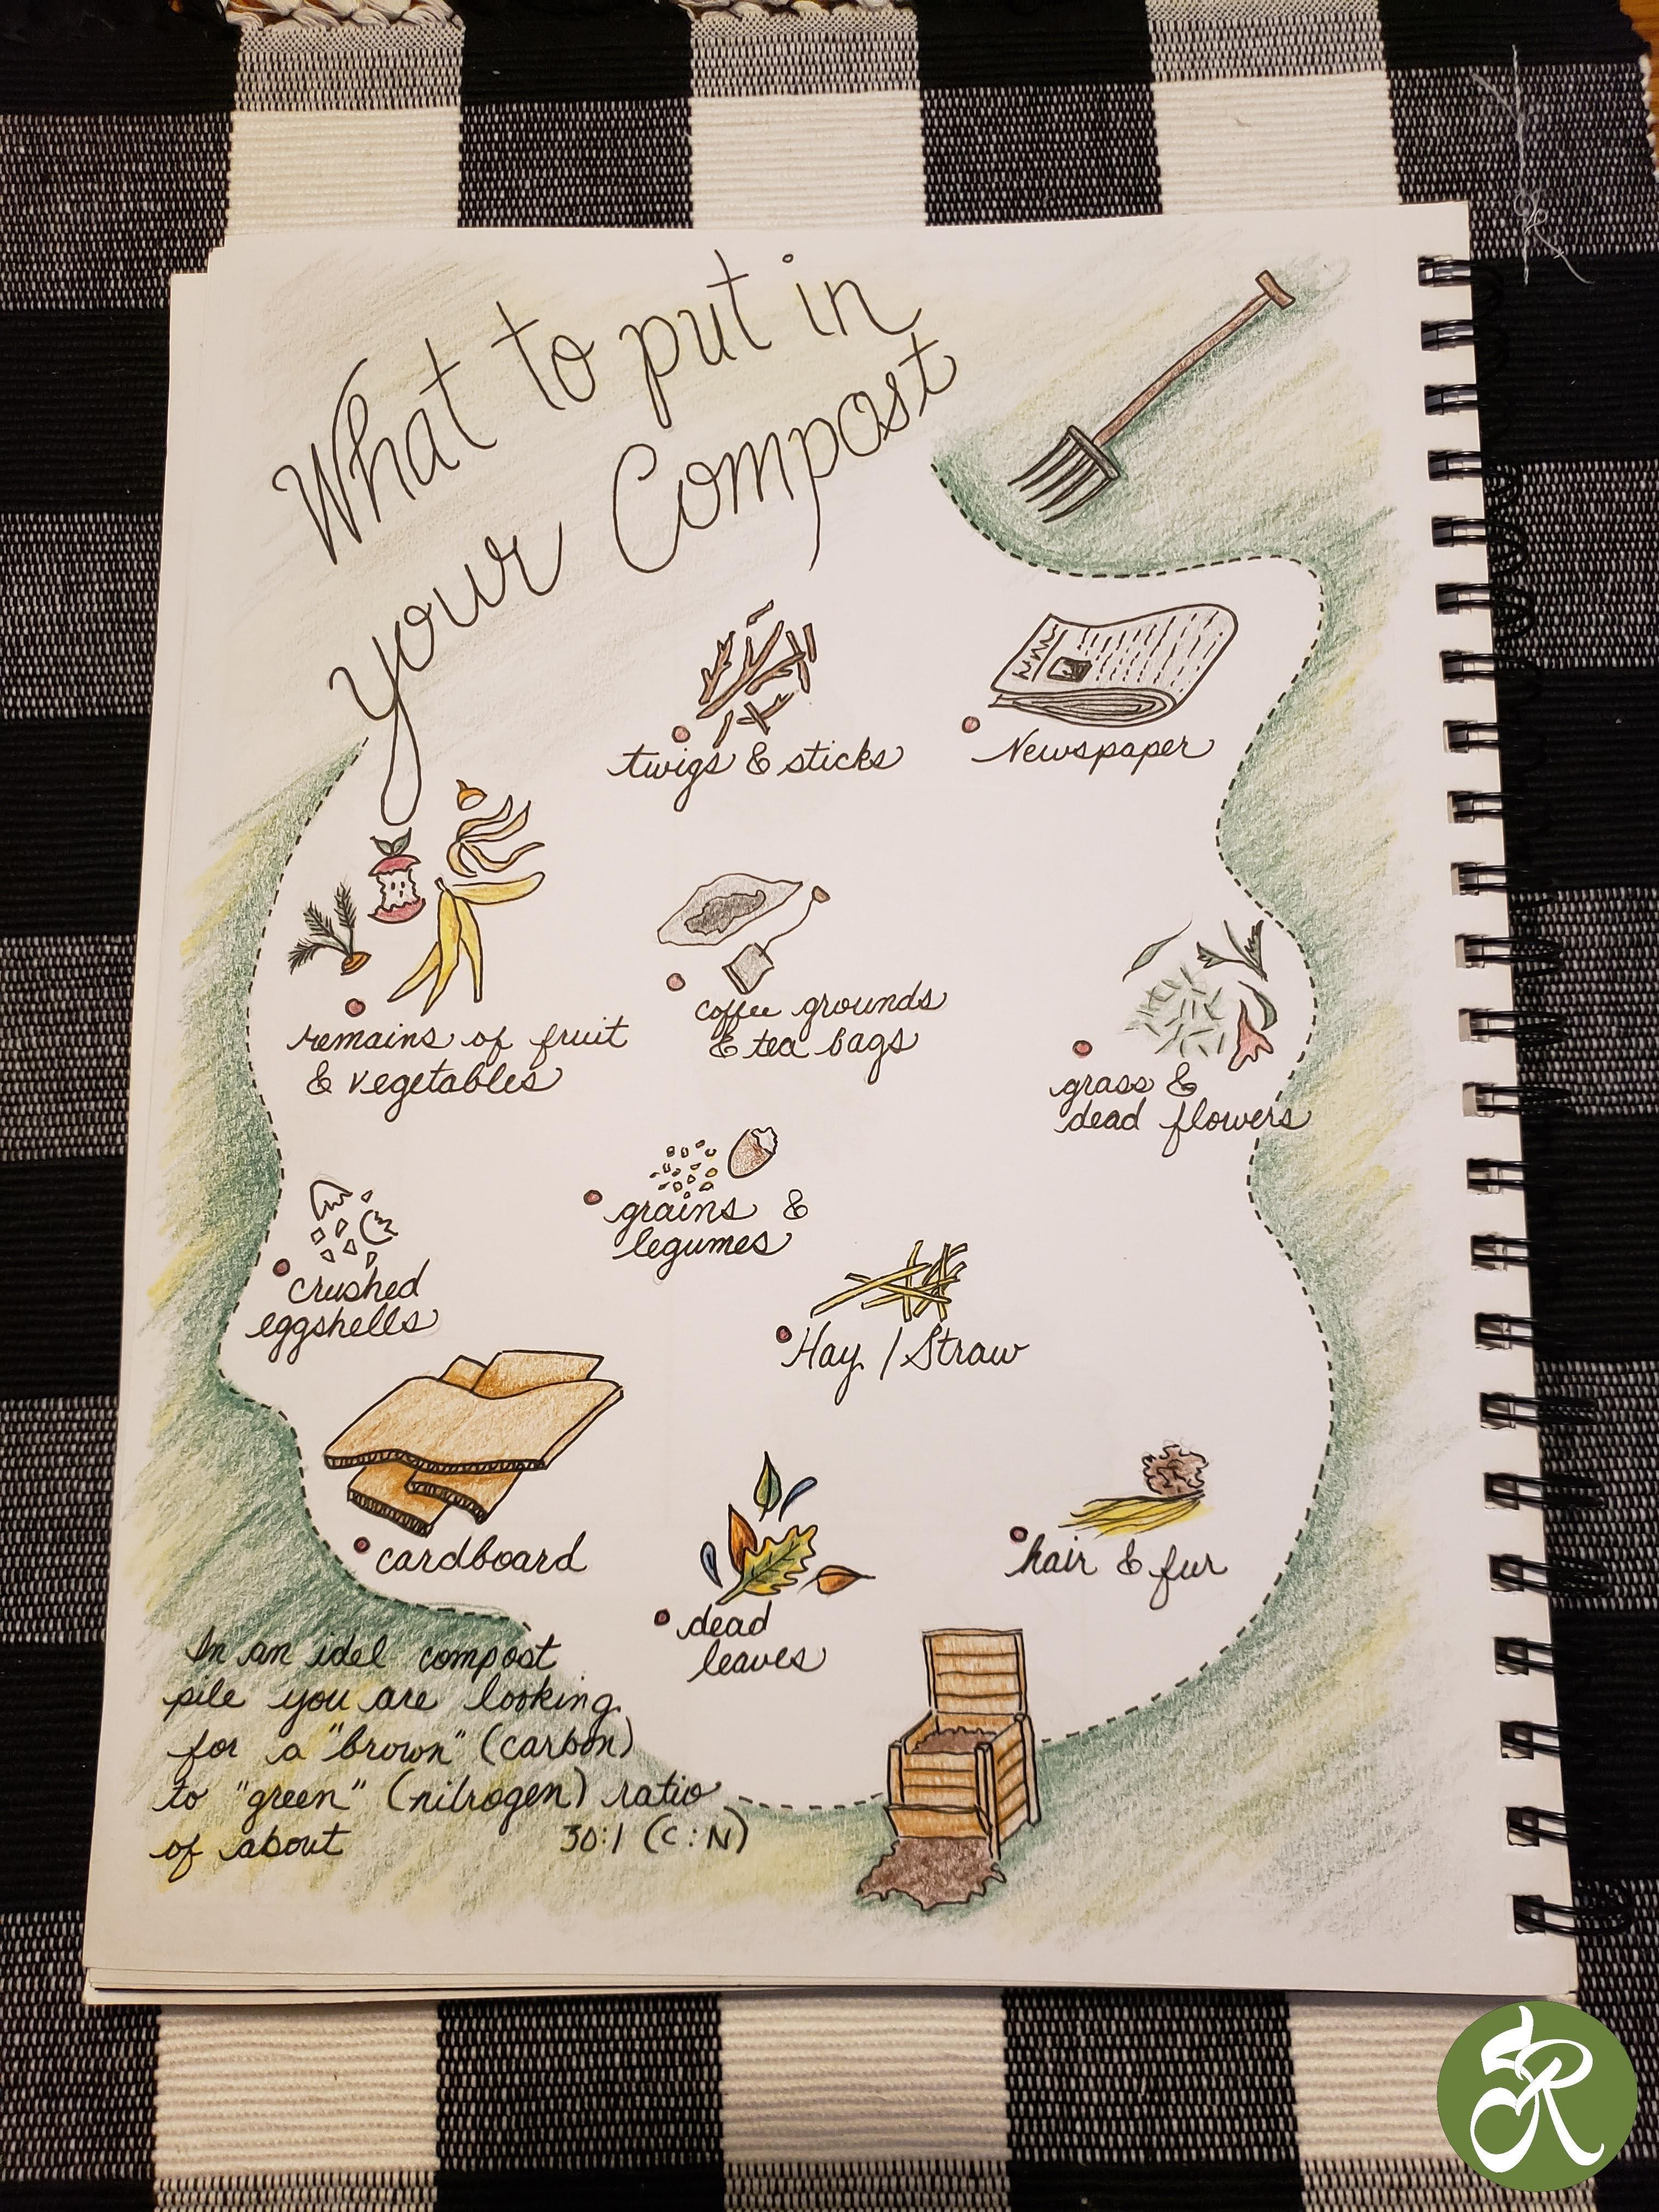
Sketch of what to put into my compost
I want to know what animals, pests, and diseases pop up in the garden, so I know which ones beneficial and which ones are not. Through this process, I learned I could use ladybugs to kill aphids. I also discovered that every year in my front and backyard, I have an abundance of praying mantis. Also, I discovered that I get hit every year with grasshoppers. They can destroy your entire garden in a matter of a few days.
Sketch of Spring to-do list
One of the many things I deal with in the garden is, it is very windy all summer long. Some winds hit 50 mph. Because of the winds, I must stake most of my plants to protect them from snapping. I also have clay for dirt in my yard, not uncommon for this area. Most of my plants do not like clay soil. I have learned that I must add clay busting additives to the garden, and constantly add compost to build up to healthy soil. I also use wicking pots to grow my vegetables due to the high winds. I use the water to help weigh down the pots to keep them from being blown over. I also use a water meter to help me to not under or over water the plants.
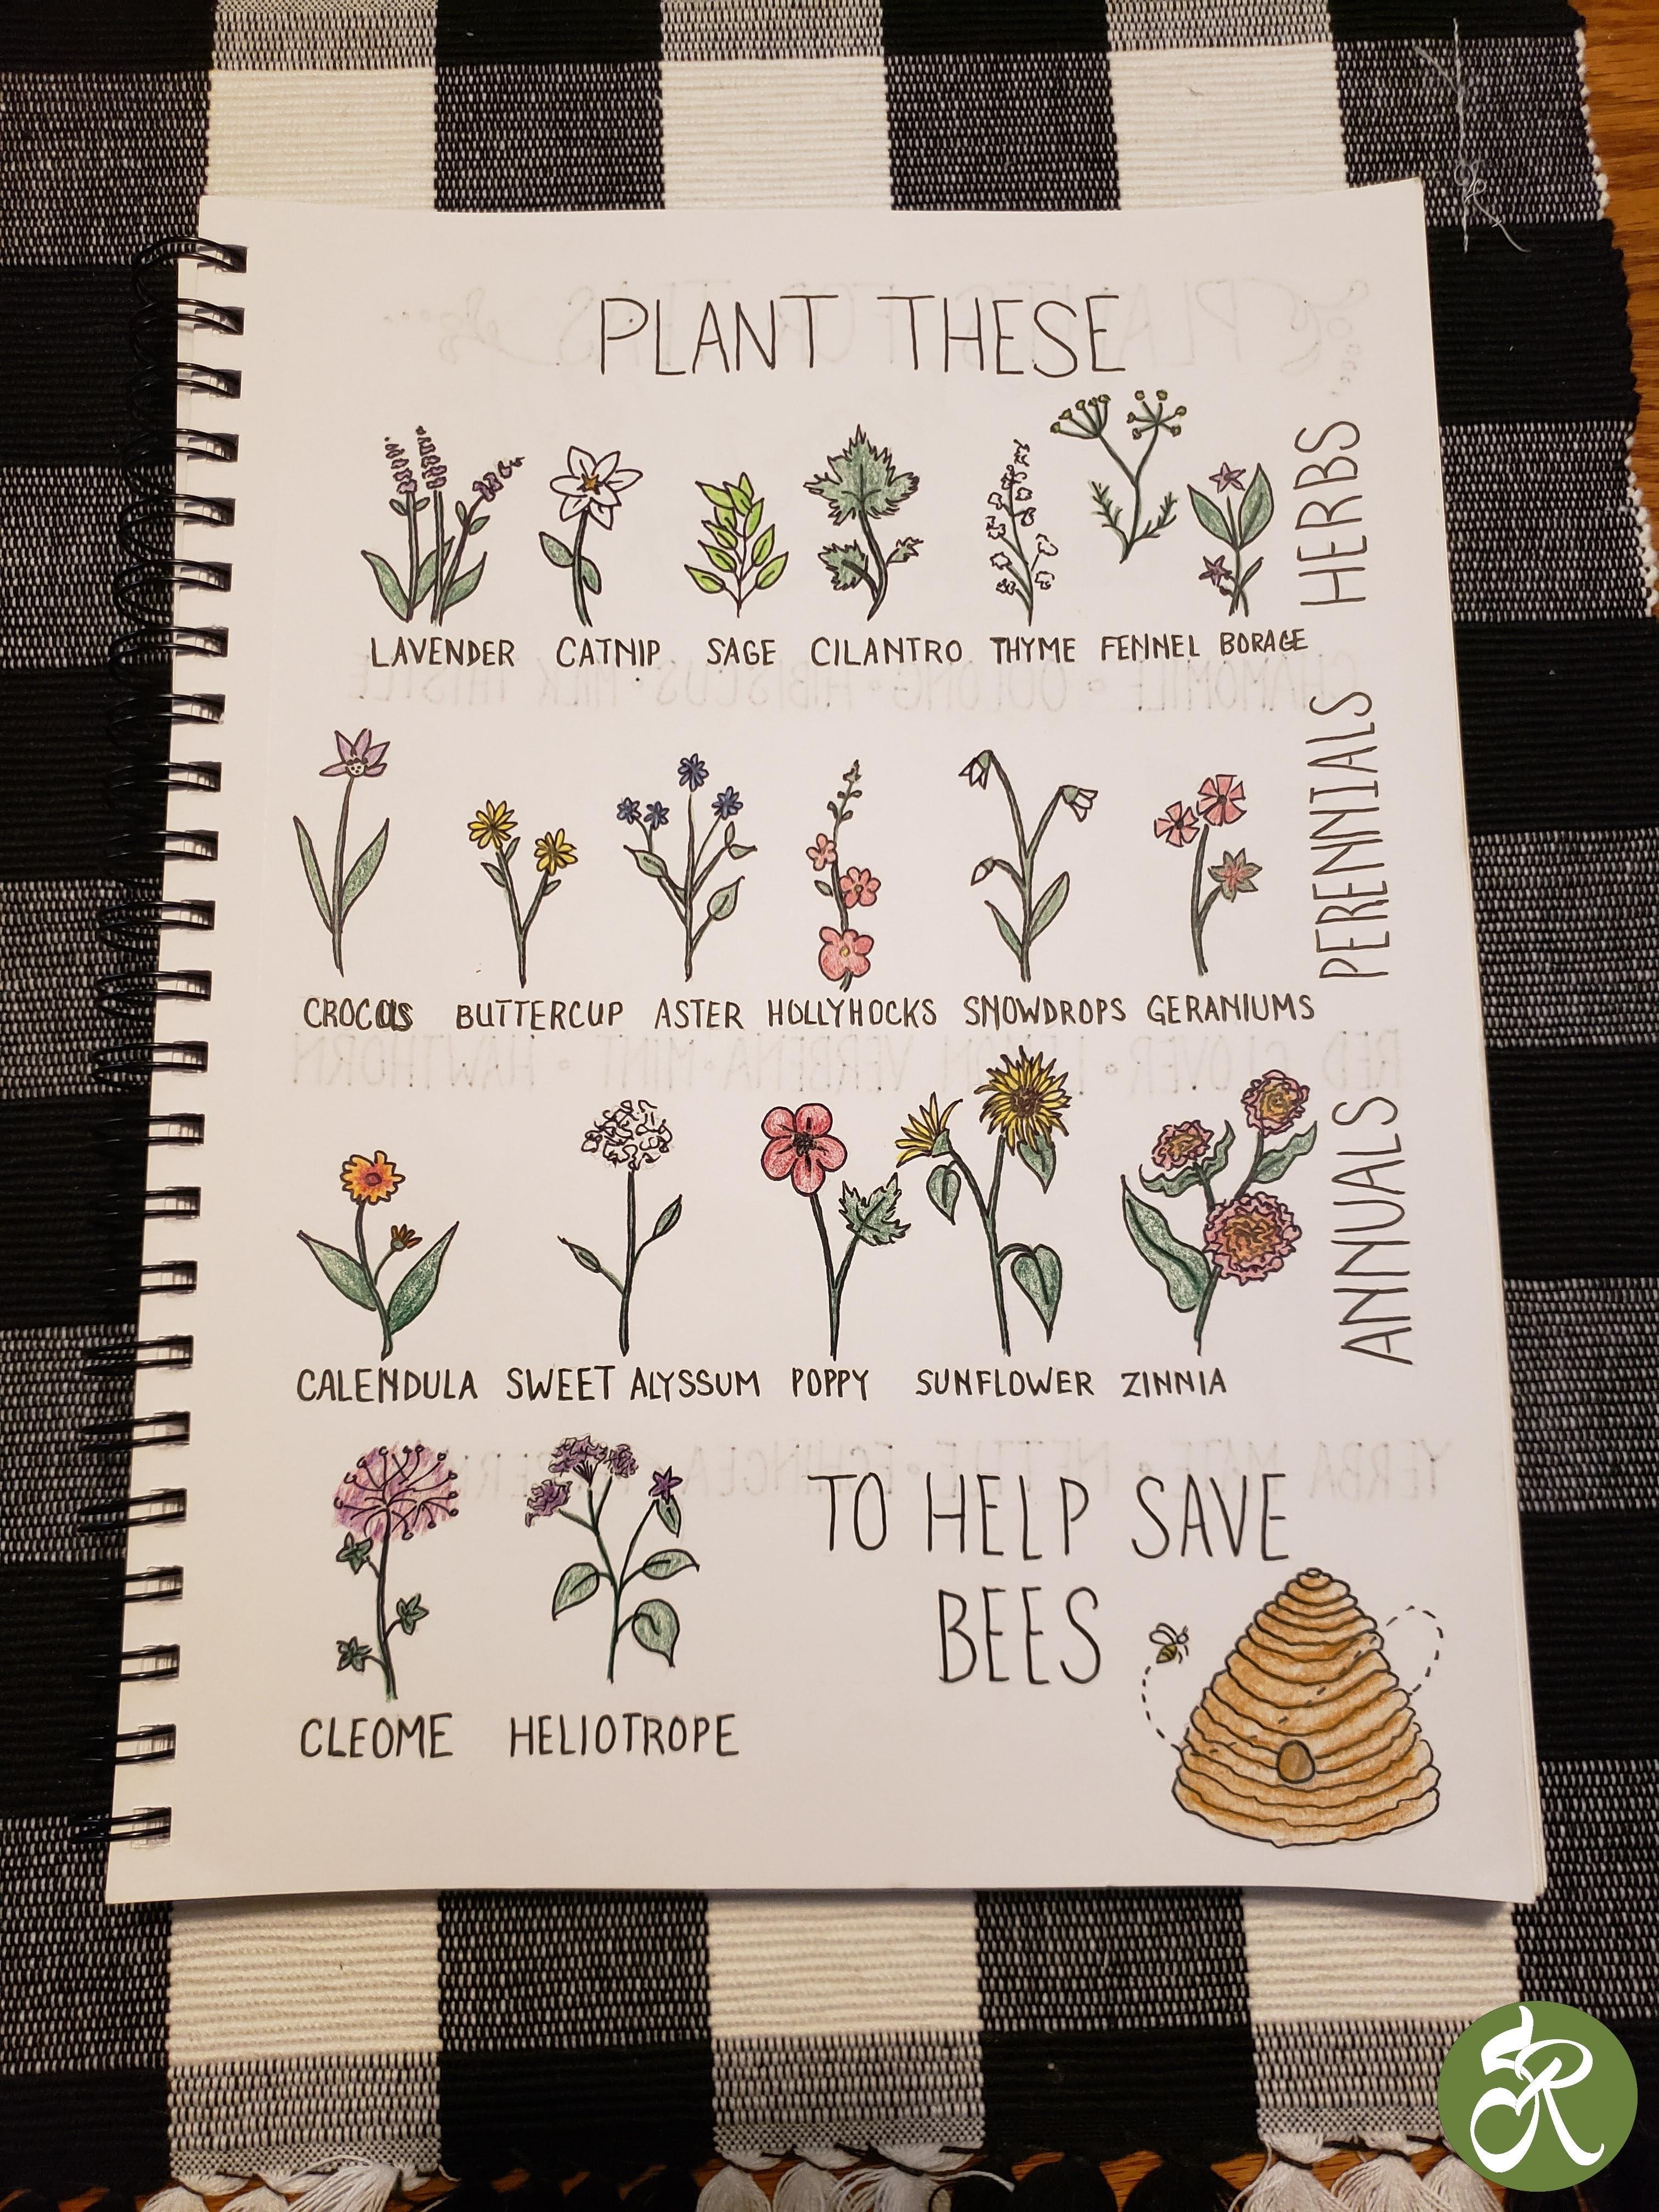
Plants to help the Bees
By keeping this garden journal, I can make note of when the grasshoppers show up each year, and then I can better prepare for them. This year I was hit hard with spotted mold on all of my zucchini plants. It was very humid this year. Being observant and keeping notes all summer helps me to be a better gardener.
How to grow an avocado tree
During the growing season, if I keep up with the health of my garden, I can increase my harvest. Last year I grew a couple of tomatoes and no zucchini at all. The first thing I did this year was to grow more than one variety of tomato and tripled how many plants that I planted. I had to move the plants around this year to find the best place to put all of the plants. The tomato and zucchini plants I tripled how many I planted this year over last year. To experiment this year with the type of plants and how well they grow, I bought 3 zucchini plants and grew the rest from seed. I wanted to see which I would have more success with. Growing the plants from seed worked the best this year in my garden.
Why are my plants turning yellow
It is a pleasure to go out and sit in my garden each day. I listen to the wind in the trees while watching the squirrels running up and down the trees and playing in my garden. At the many bird feeders in my yard, I have birds dropping by all day. You can hear the bees zipping around going from flower to flower doing the pollinating for me. To help the bees out I have added a bee hotel to help them through the winter.
Last night for dinner we enjoyed eating green beans from my garden. It is so satisfying to eat what you grow. These are some of the topics I have so far in my garden book. Title of the book When to plant vegetable plants A sketch of the layout of my patio garden. (I moved things around so this sketch is not accurate ) Sketch of my front entrance so I know what I planted for next year. What to put in my compost A to-do list in the Spring, Summer, Fall, and Winter. A page for each season Plants to plant to attract bees Plants to grow to make my teas How to grow an Avocado tree. Even though I cannot grow these outside year-round here. A page on why my plants’ leaves are turning yellow.
I have so much more I will be adding this year to my garden journal. I hope you enjoyed the idea of a garden journal.
I am one of those people who loves being at home, not a hermit mind you, just at home. I strive to create a space of peace and harmony throughout the house and garden. I keep a journal for the plethora of ideas I have for future projects. This helps me to plan and budget for the projects that I want to do.
During this pandemic, I have found I am as busy as if I were at a paying job outside of my home. With the situation of the virus, I am not a panic type of person, so I was confused by the public panic and hoarding. What I would like to talk about is being proactive vs. reactive. We can not control who gets COVID-19. We can not control anything about the economy right now. We can not control, most of us cannot if we have a job. What we can control is what we do about it. The one place you can take control back is to plant a garden. When times are bad, we plant victory gardens. This style of gardening was popular during World War II. We are finding ourselves in a similar situation with shortages again. Although not as difficult as during the war but, we should still be proactive. I would suggest that you plant it as large as you can handle growing and taking care of one. I have experienced food shortages in grocery stores. The cause was not a shortage of food, it was a problem with the distribution of the food. Farmers and ranchers could not get their products to the market. Instead of us panicking we have two choices.
label all your plants. dates on the back for when you planted them.
First, I would suggest that you find a way to buy directly from the farmers and ranchers if you have no yard or any place to grow food. Second, I would suggest you plant a garden.
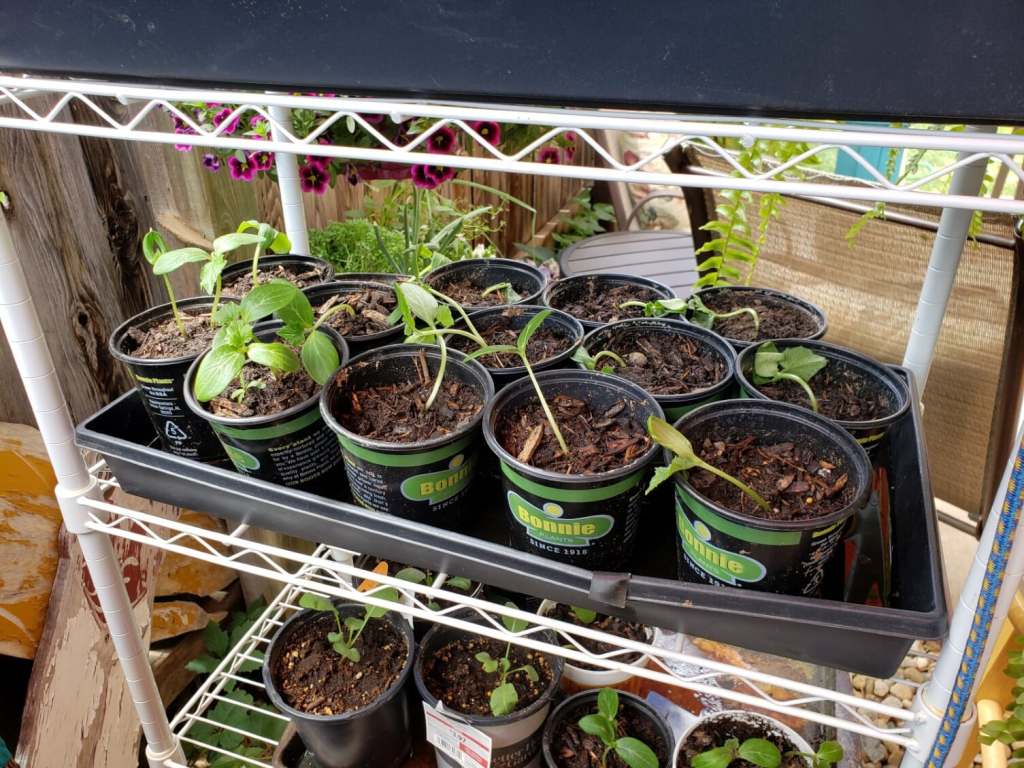
Save your pots when you buy new small plants to start your own seeds
I grew part of my plants from seeds, and additional plants were purchased as seedlings from the store. I went shopping several times a week to find all the plants I wanted. (we still must wear masks in the stores) I plan to preserve the harvest come fall.
Cucumber plants getting ready to transplant to bigger pots
Bush Tomatoes and Bush Beans read to be planted
Great way to start your seeds, then just plant the eggs in the soil
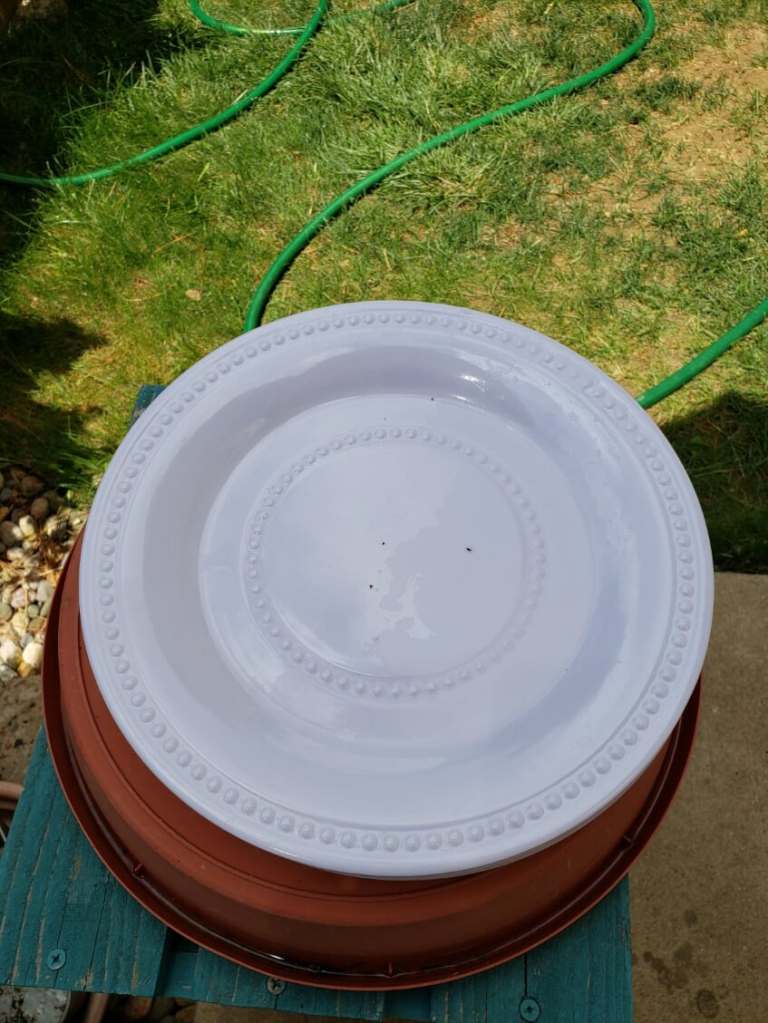
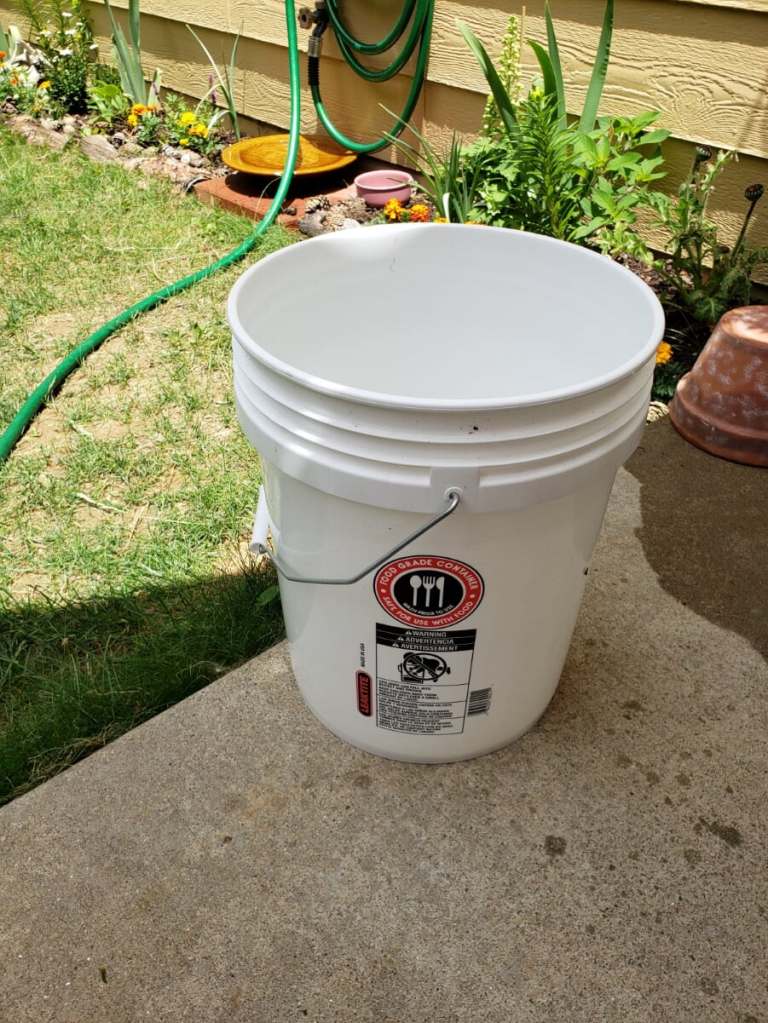
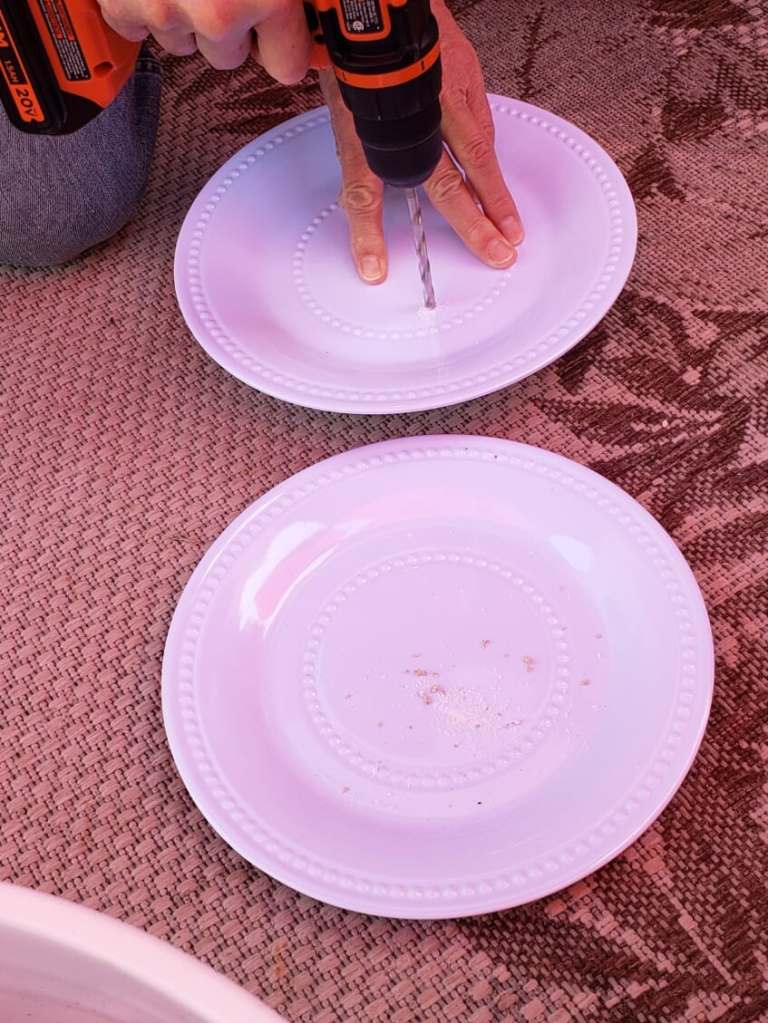
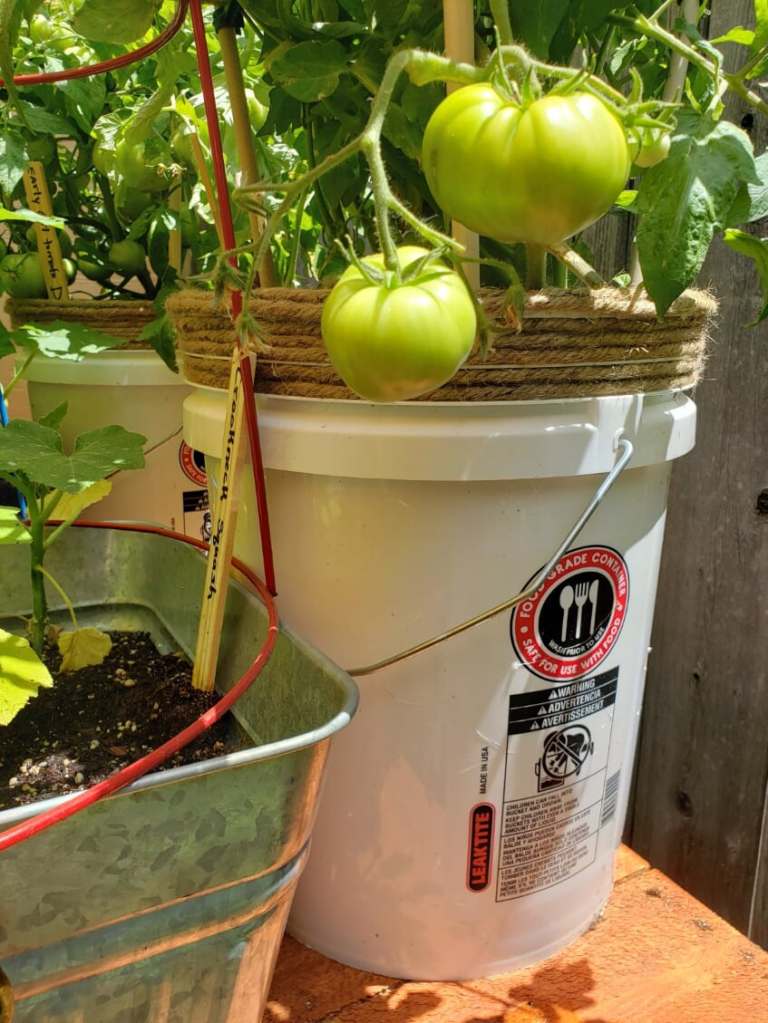
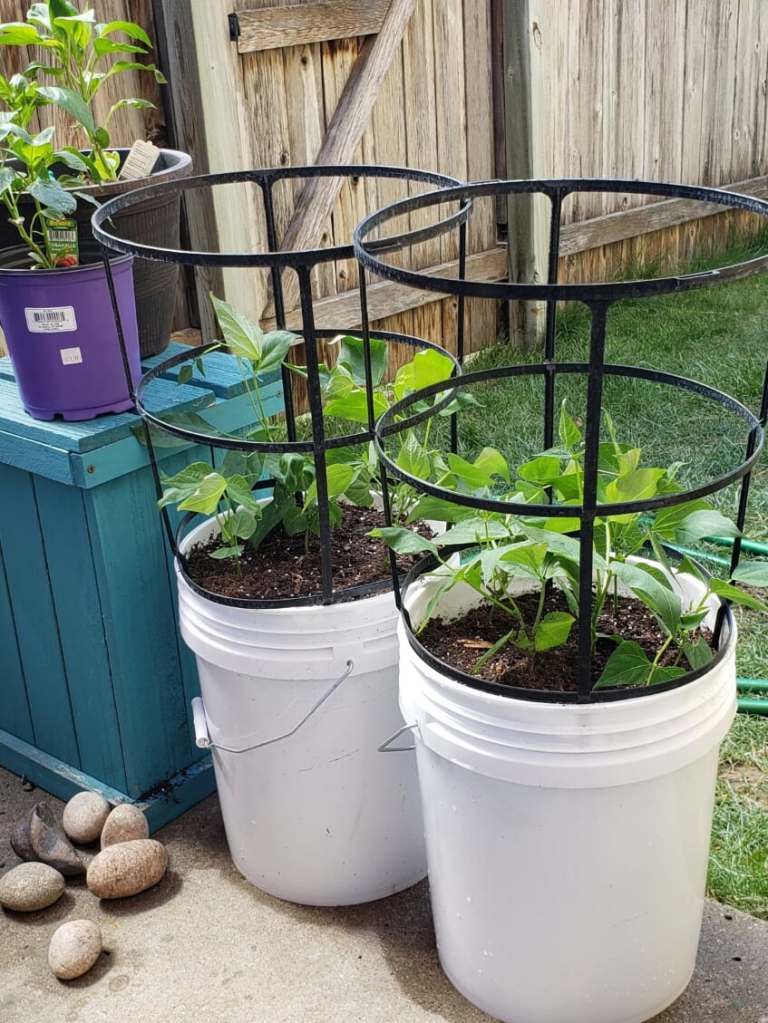
I am experimenting with a different way to grow my crops. I bought food grade buckets at the hardware store. I bought 11” plastic plates at the dollar store to put in the buckets. I saved aluminum cans to put in the bottom of the buckets. I am doing this for several reasons. My yard is like a wind tunnel, and everything gets blown over. Filling the bottom of the bucket with cans and water will add weight to the buckets.
Plastic plate from Dollar Store
Food grade bucket for planting
Need a wood block under plate to drill
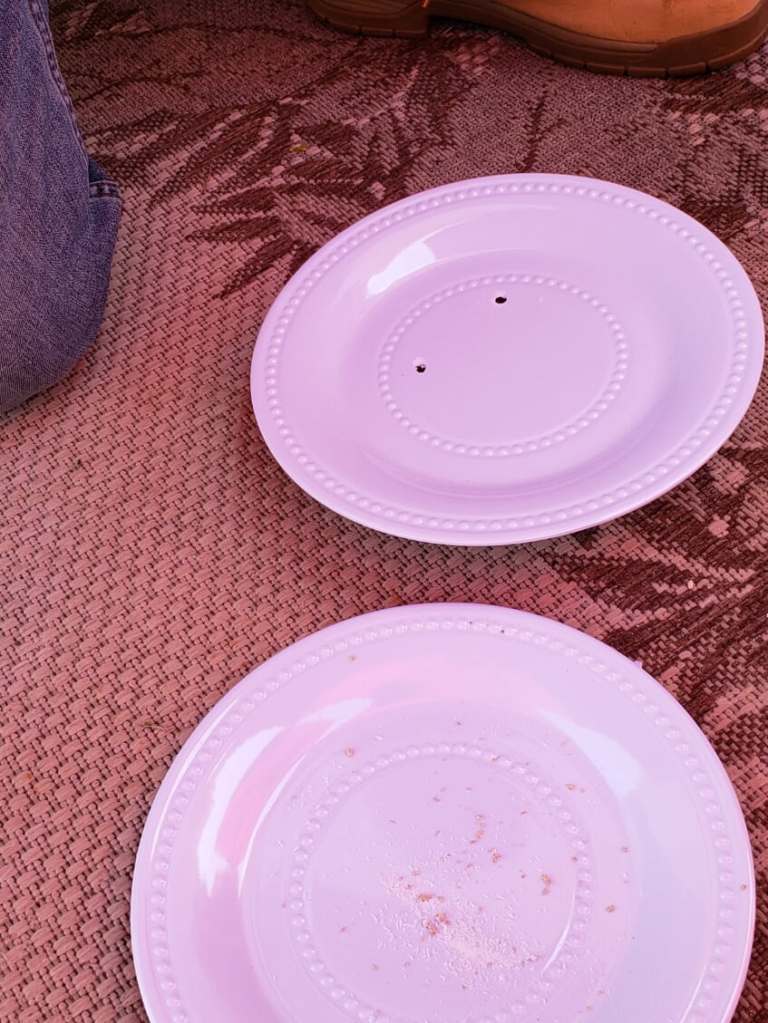
Drilling the holes in plates
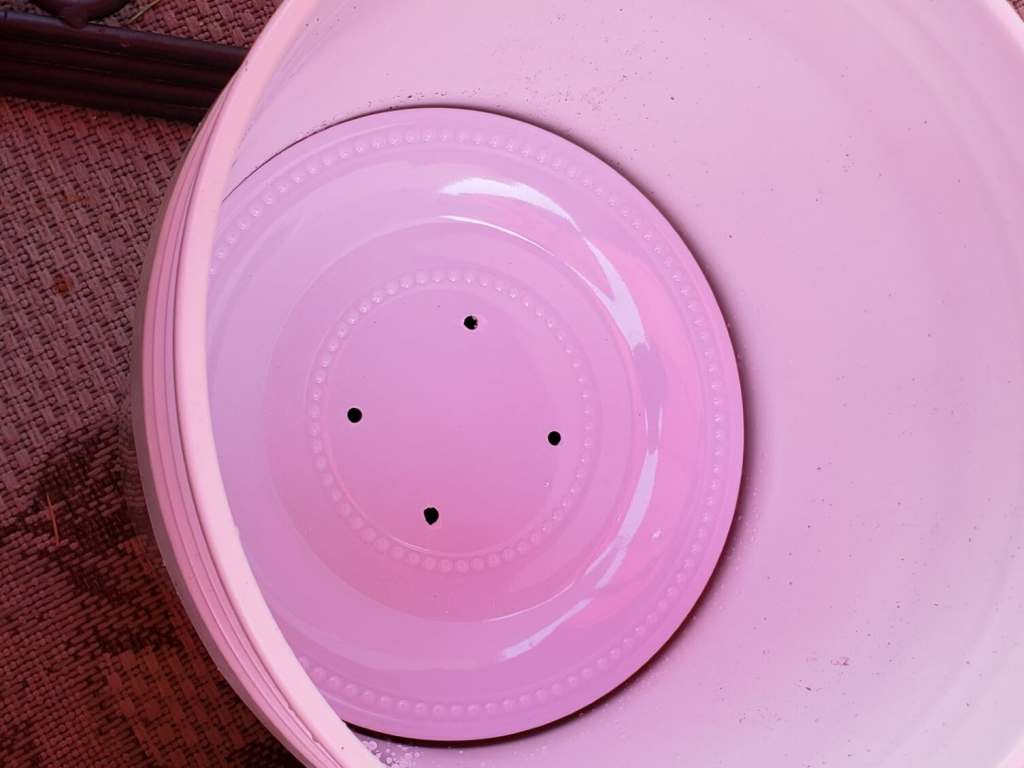
Plastic plate with drilled holes for drainage
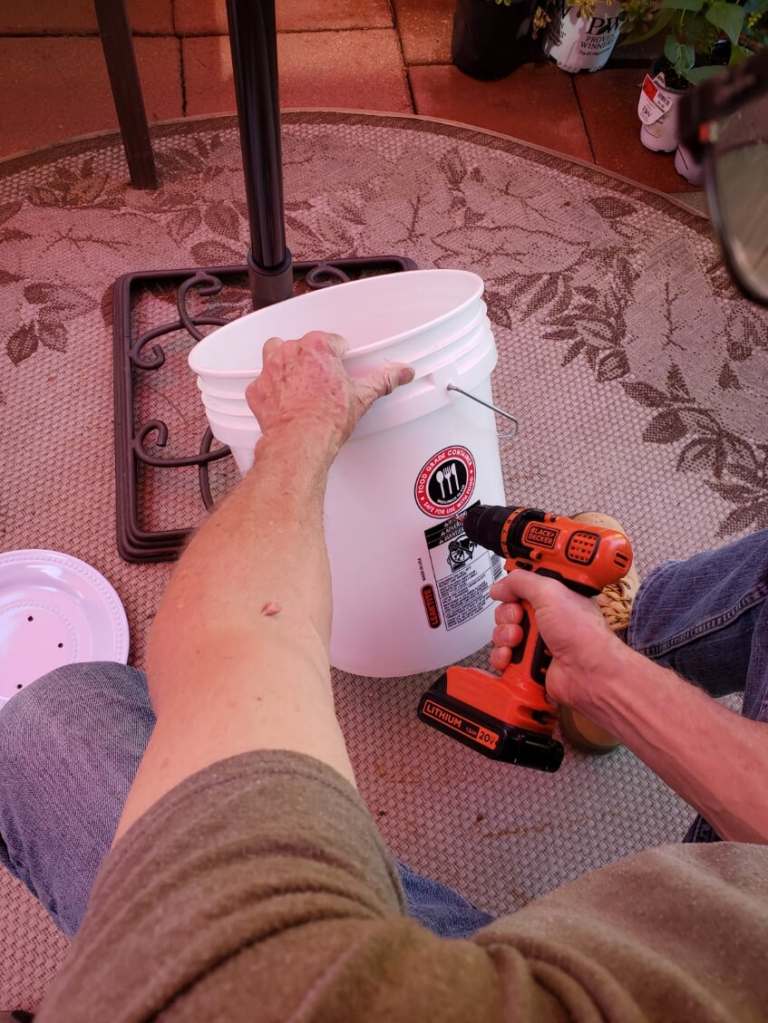
I am experimenting with wicking buckets to grow my garden this year. I set the aluminum cans standing on the bottom of the bucket. I then drill holes in the plastic plate that will sit on top of the cans. Once the plate is in place, I drill a large hole on the side of the bucket just above the plate, for the overflow. Now that I have the cans and the plate in place in the bucket, I put coffee filters (coffee filters are from the Dollar Store) over the holes in the plate. Fill the rest of the bucket with soil and then plant your plants.
Steve drilling a large hole for the overflow of water
I planted dominant tomatoes all ripen at the same time rather than over the whole season. I also planted zucchini and bush beans in the wicking bucket method.
jute glued to bucket
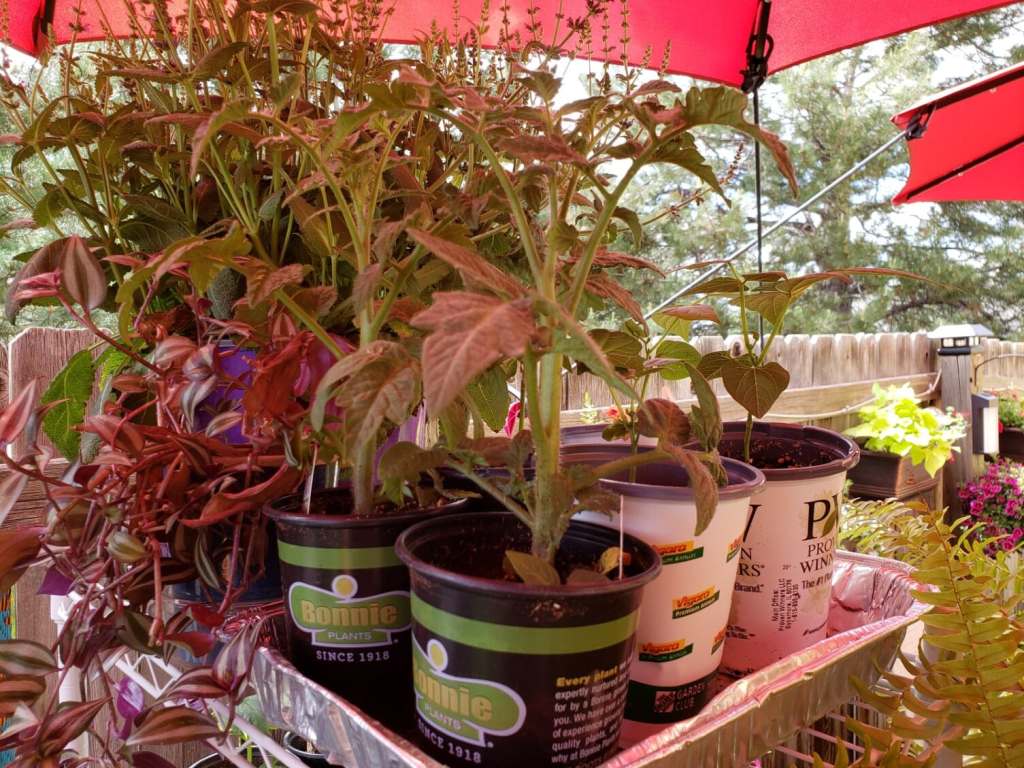
Bush Beans
Zucchini, Tomatoes
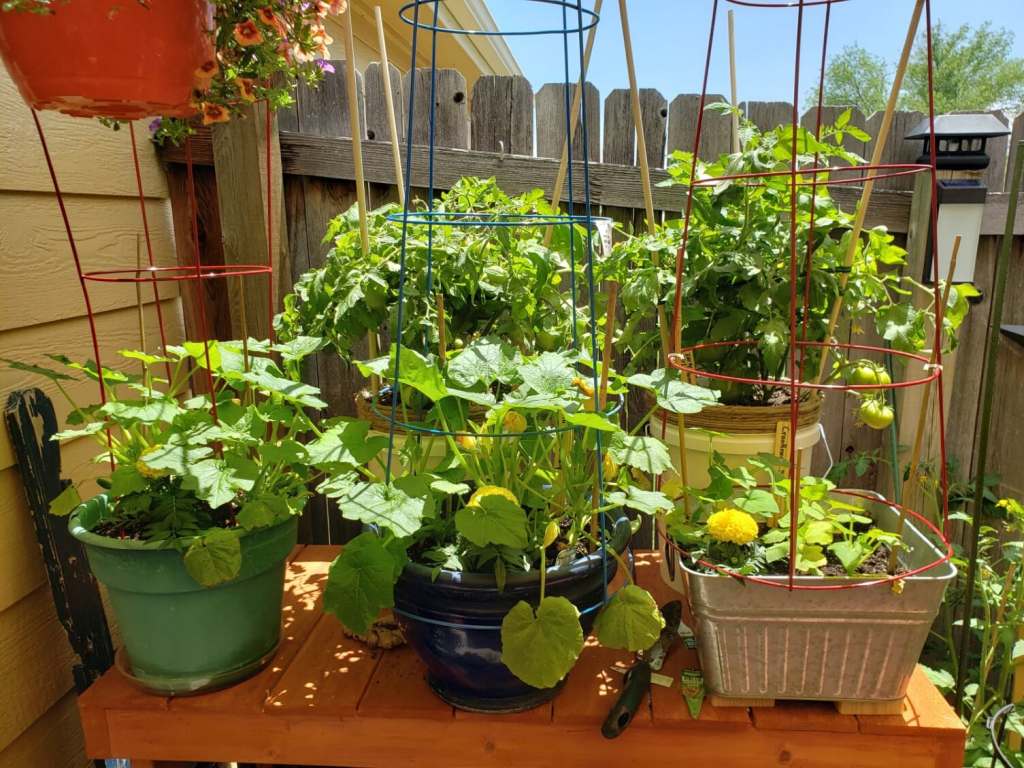
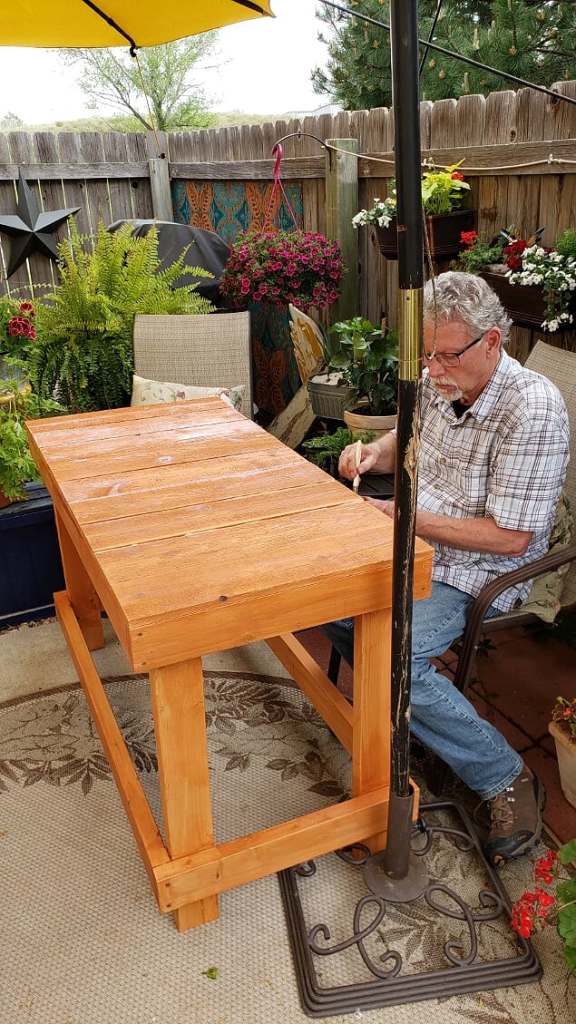
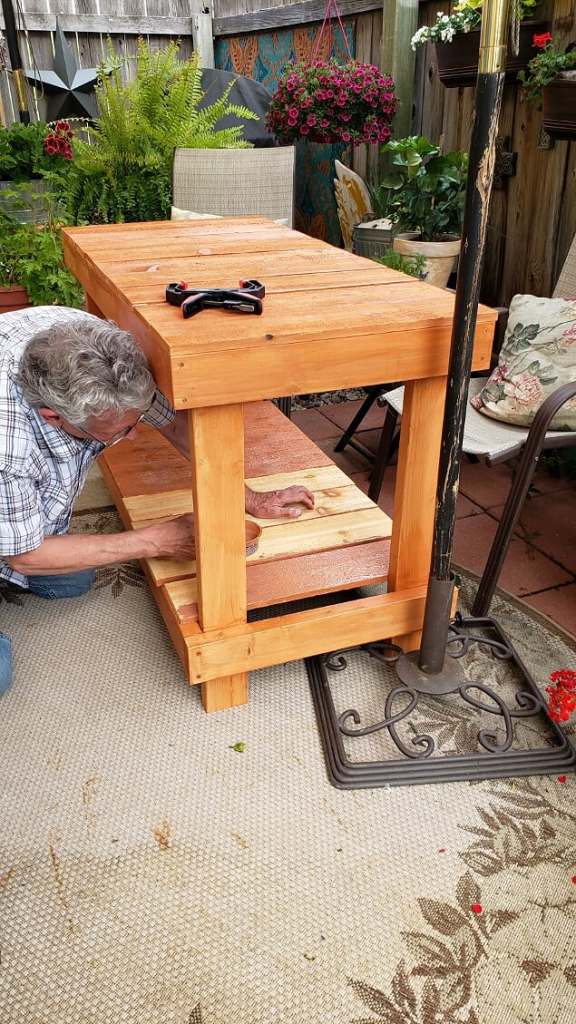
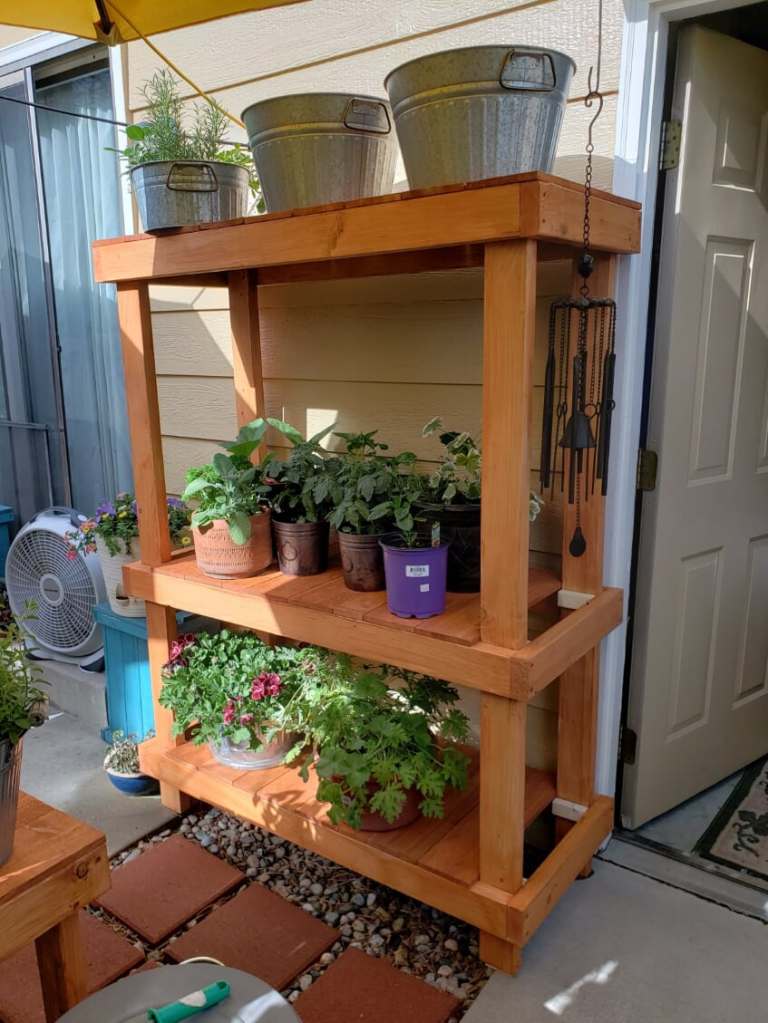
In order for me to grow all these plants in the small space Steve built me plant stands much like the ones they use at nurseries. They had to be large and heavy so the winds would not knock them over. (I was adding jute around the top of the buckets also till I ran out of jute.)
Steve assembling the table that he built for the patio
Assembling a second table
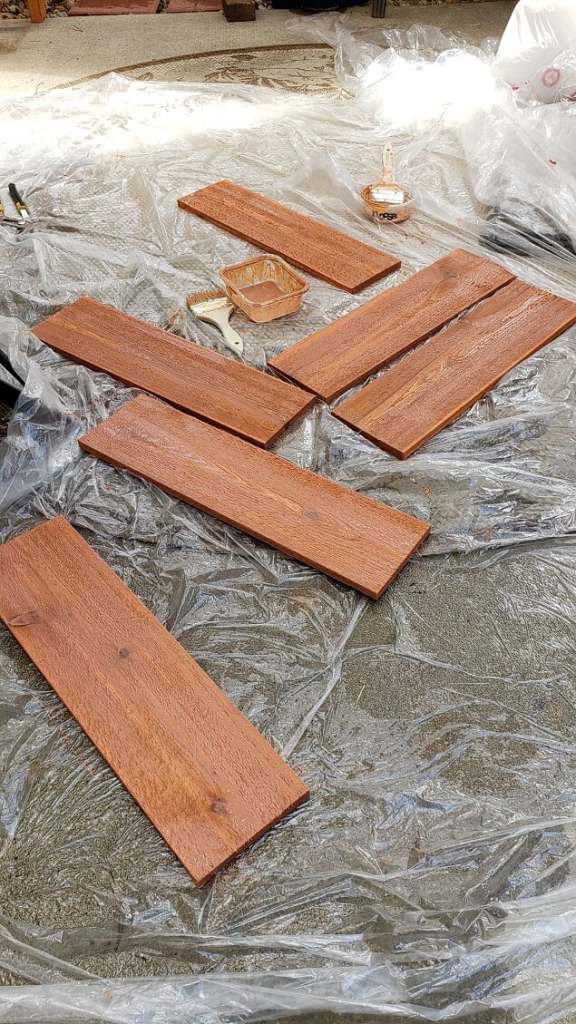
All the tables are waterproofed
Tall table will also be a potting table soon
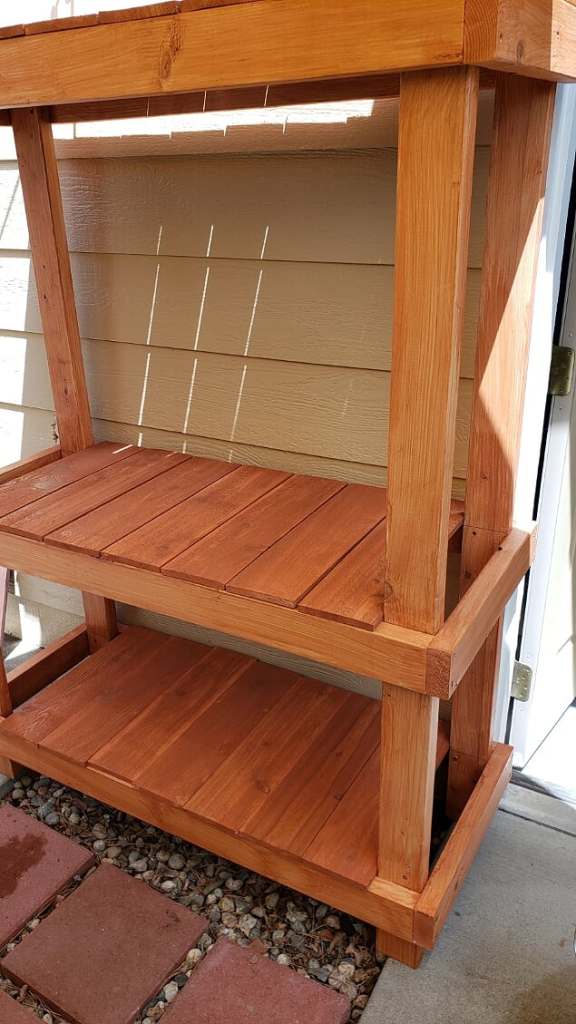
It is nice and organized and sturdy
This unit holds a large amount of plants
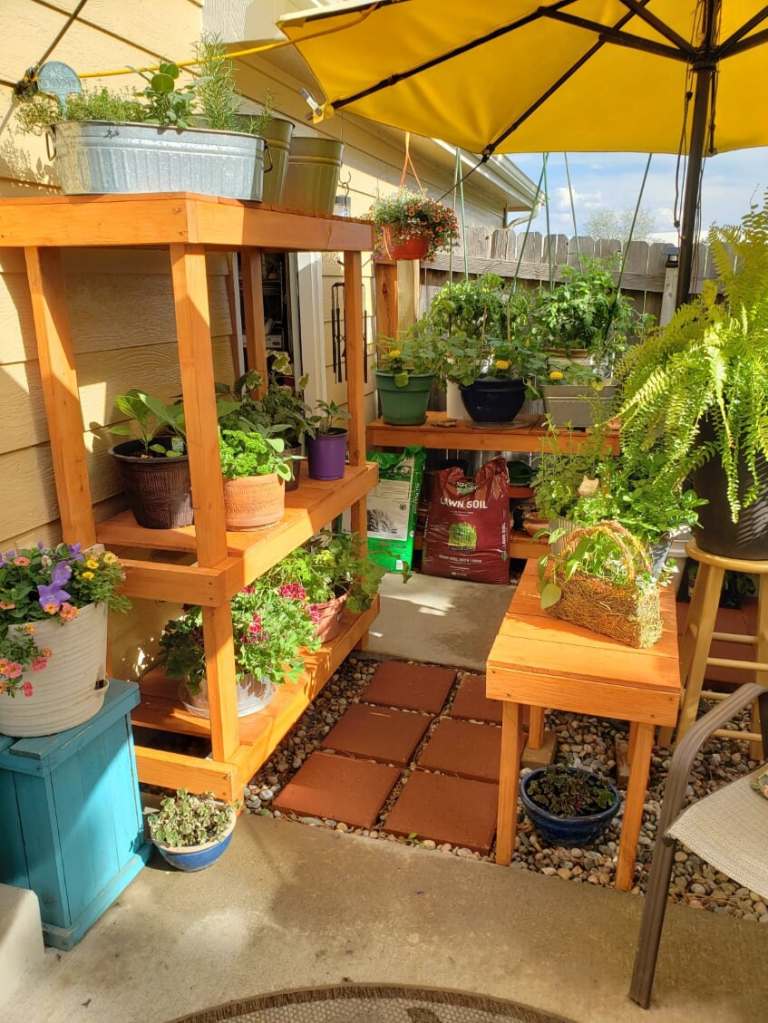
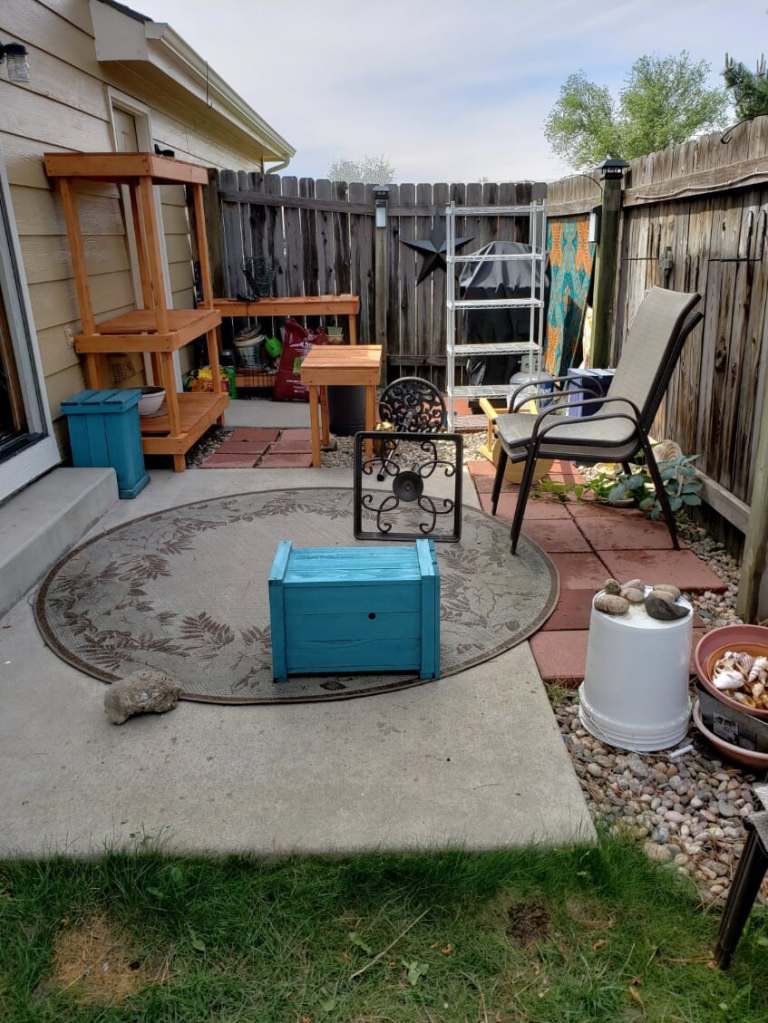
Before
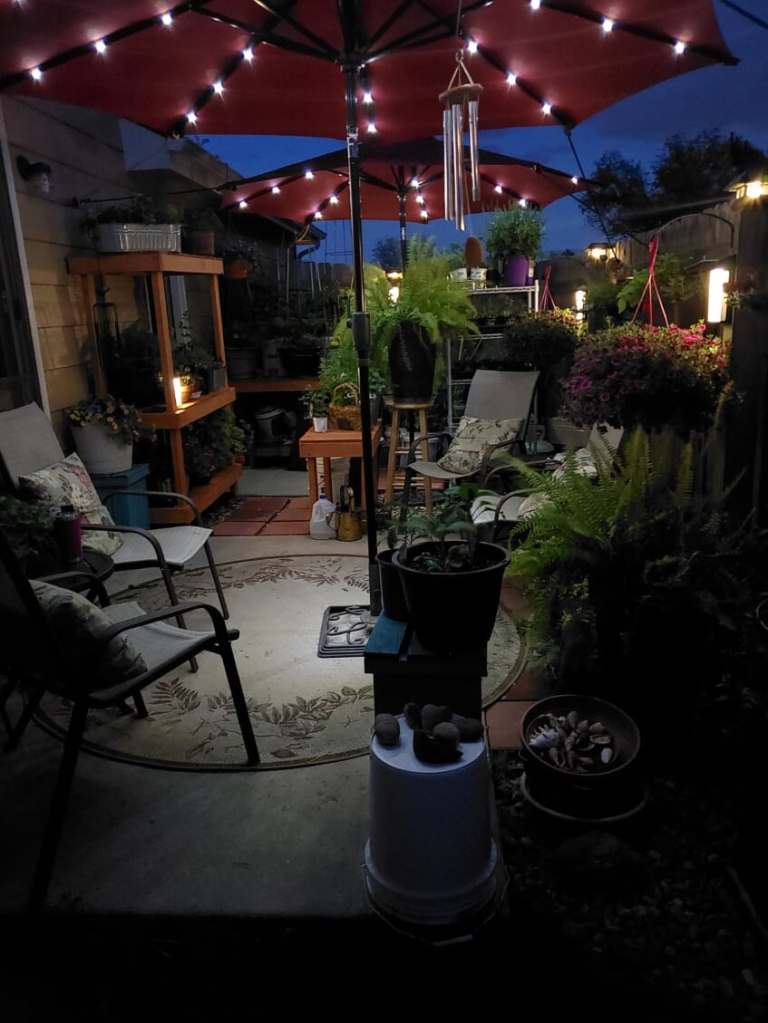
After at night
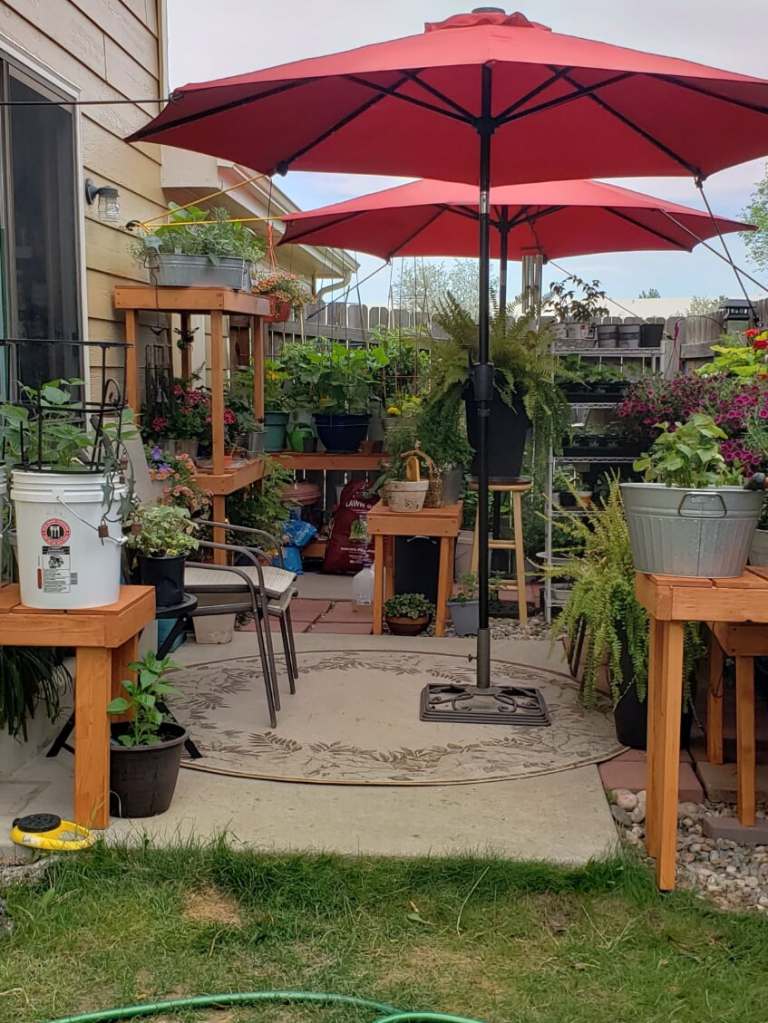
After during the day
We added solar lights on the fence and in the umbrellas. We had to replace the umbrellas this year due to a storm that broke the umbrella we had.
Bee Hotel
I would also like to discuss bees. I do not have a hive but I do have a bee hotel. The type of bee that lives in a bee hotel is a mason bee. They are fantastic at pollinating your garden. I suggest that you plant flowers all around your vegetables to help draw the bees in to pollinate. (hope you are not afraid of bees, or allergic).
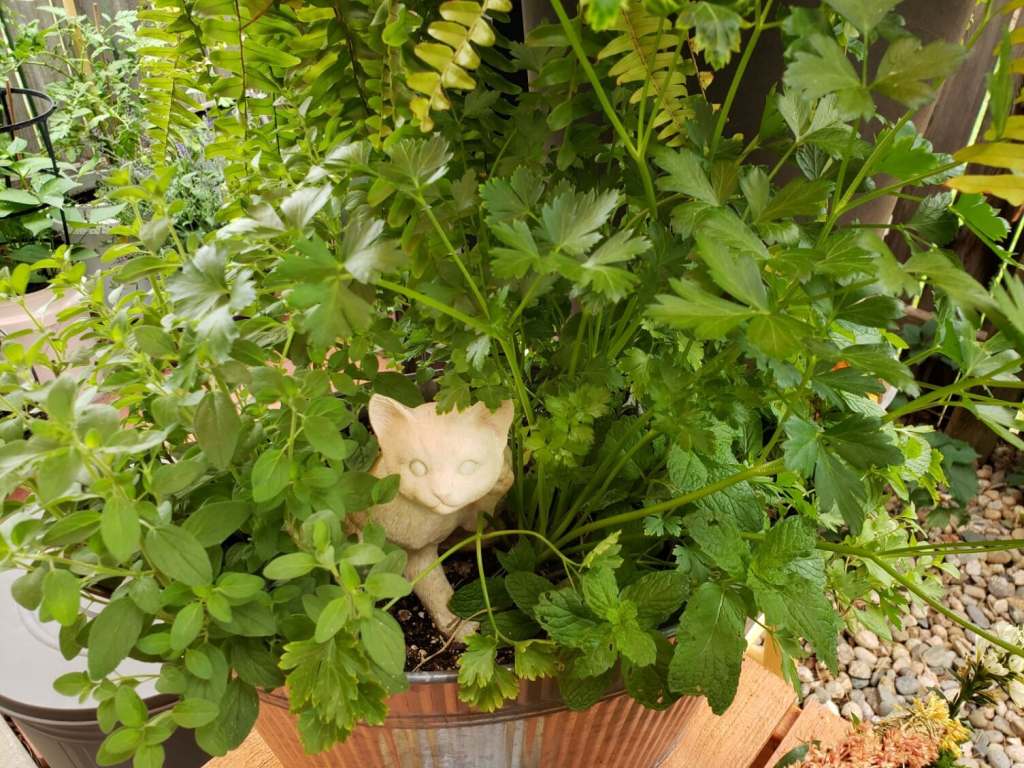
Herbs, Flat Leafed Parsley, Italian Oregano, Sweet Marjoram, Sweet Mint
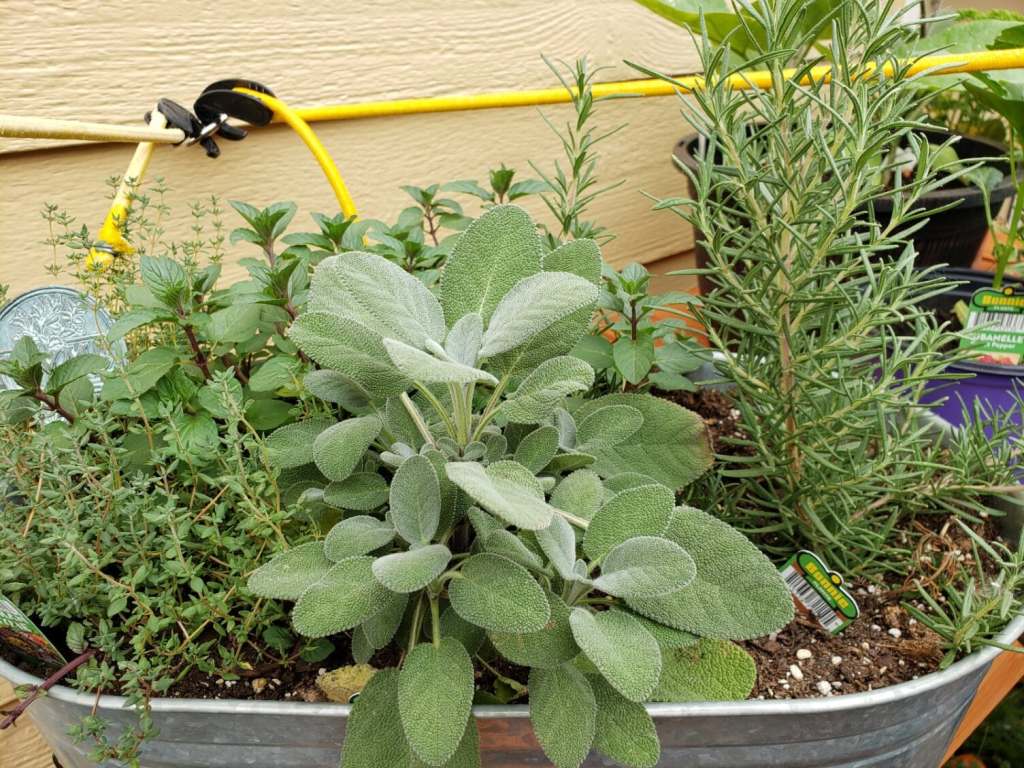
Herbs, Sage, Rosemary, German Thyme, Peppermint
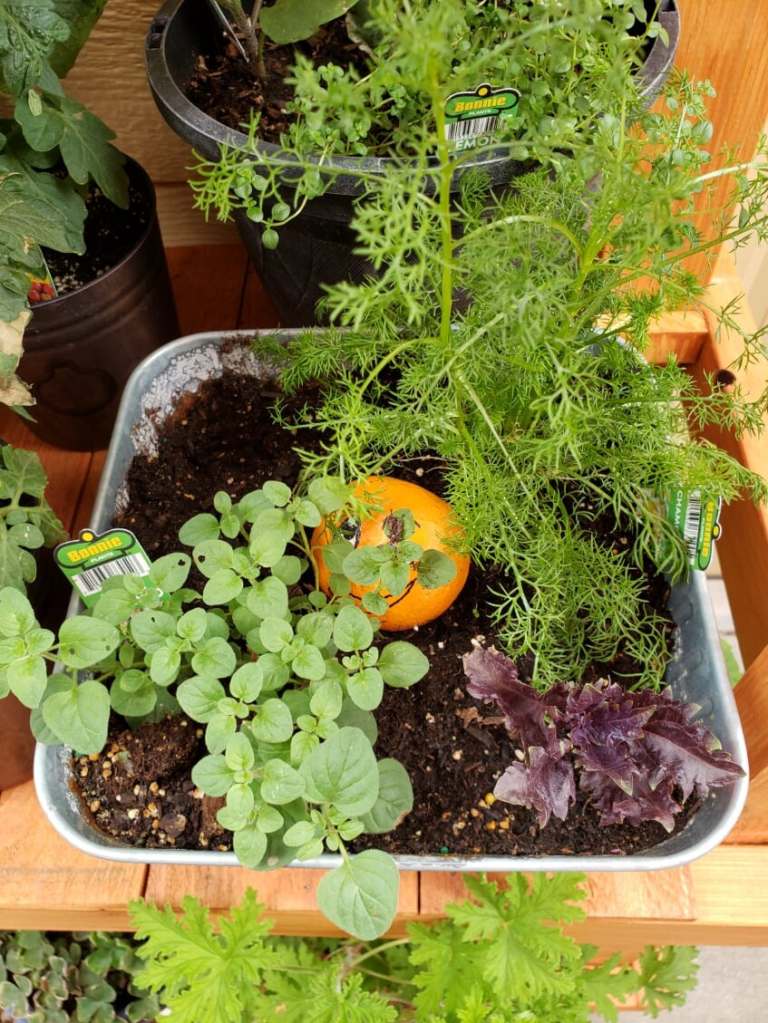
Herbs, Chamomile, Purple Basil , Greek Oregano
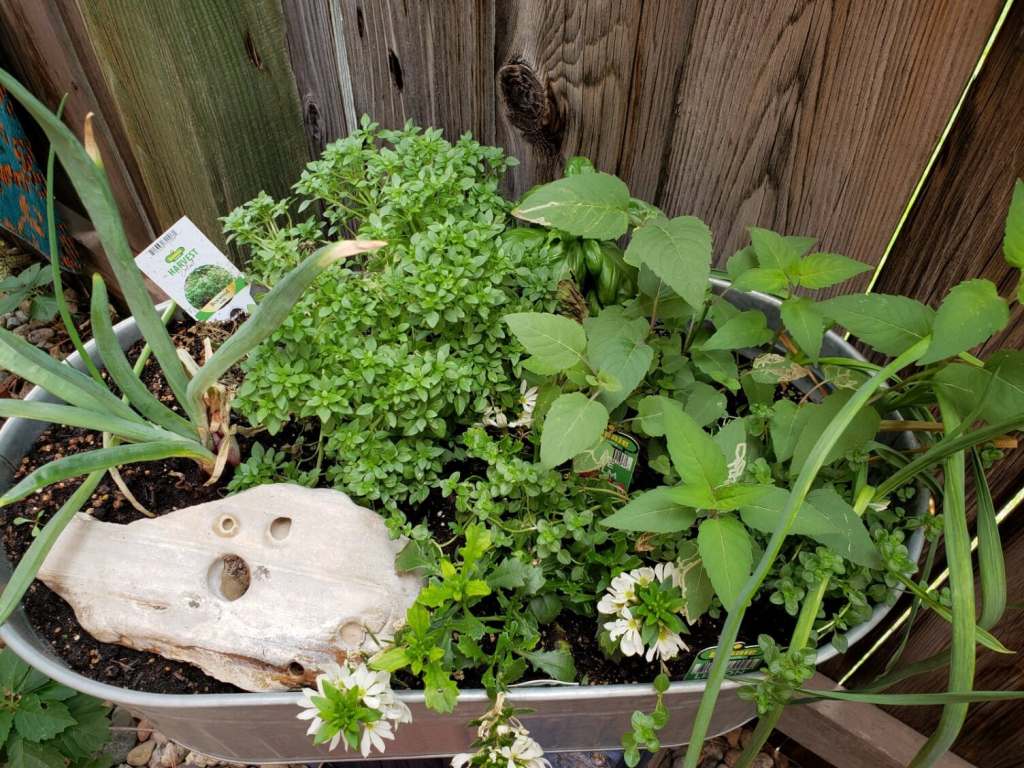
Red Onion, Green Onion, Mound Basil, Bee Balm, Lemon Thyme
In my container garden, I am also growing a large assortment of herbs. I plan on drying the herbs and using them throughout the year for cooking, teas, and medicinal.
Plants I Planted this year
PLANT
Variety
How many
Basil
sweet basil
2
Purple
1
boxwood
1
Mint
Sweet mint
1
Peppermint
1
Chocolate mint
1
Stevia
1
Oregano
Italian
1
Greek
1
Rosemary
2
Sage
Garden
2
Tyme
German
1
Lemon
2
Bee Balm
1
Sweet Marjarom
1
Parsley
flat
1
curley
1
Tomato
Bush Early Girl
6
Early Girl
2
Zucchini
Black Beauty
10
Crookneck
2
Peppers
Purple Bell
2
Cubanelle
1
Chamomile
1
Eggplant
Black Beauty
2
Ichiban
1
Green Beans
Garden Bean
16
Cucumber
Chompers hybrid
20
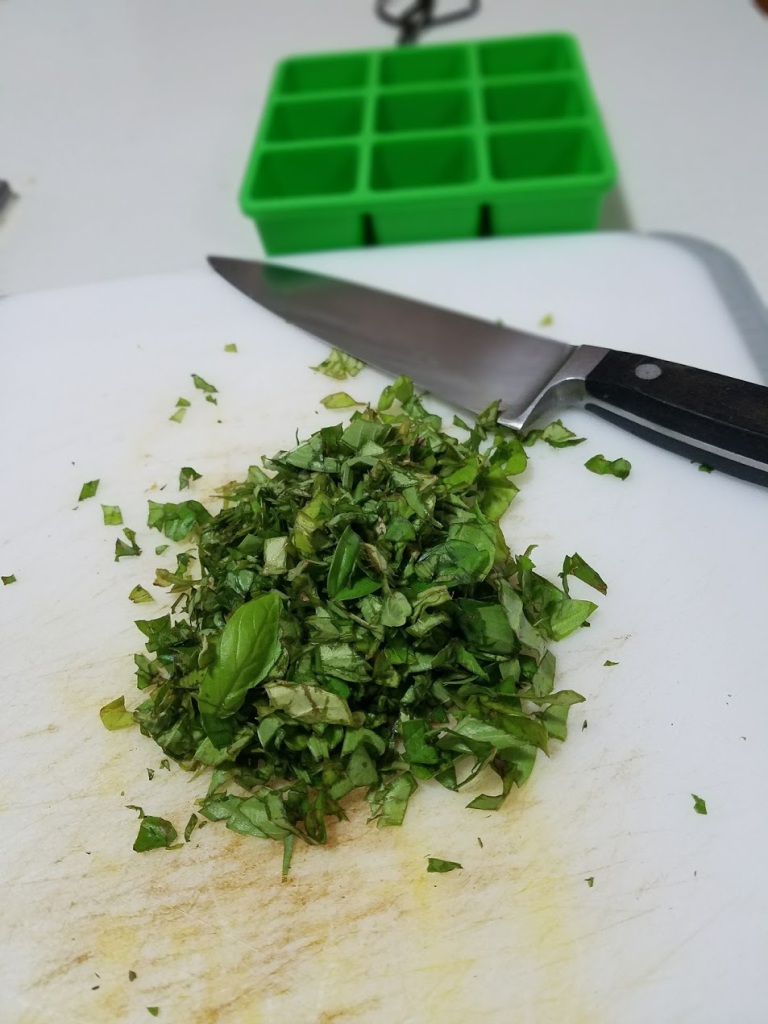
Basil leave pulled off stems
Diced up Basil leaves
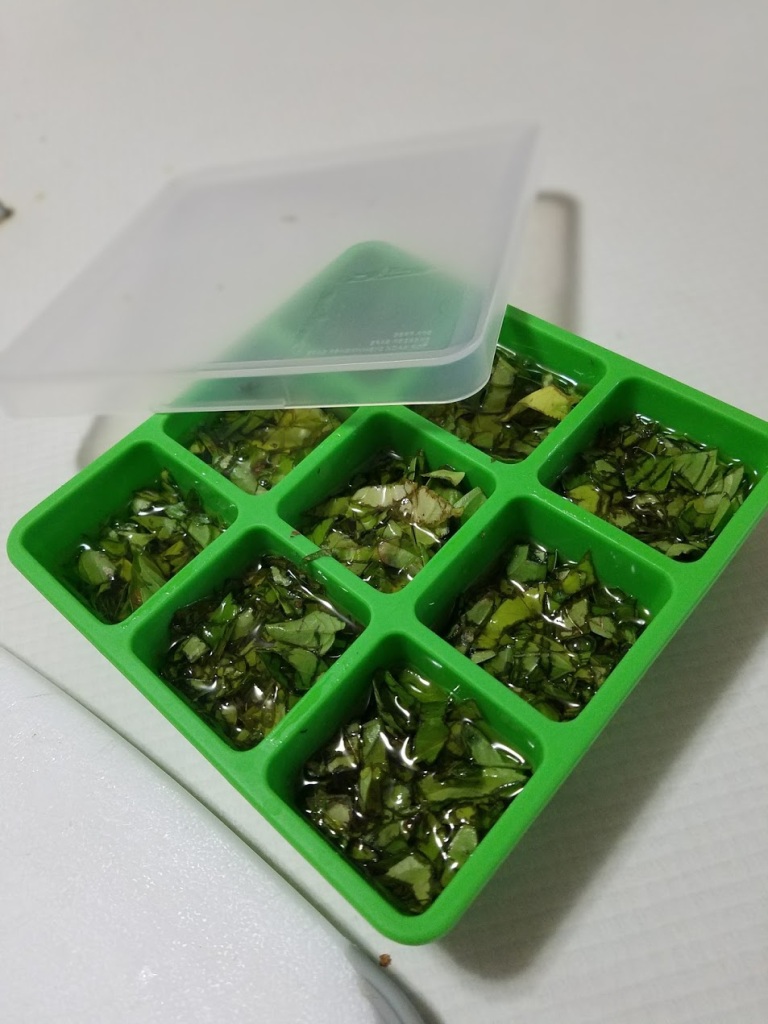
Basil leaves in Olive Oil
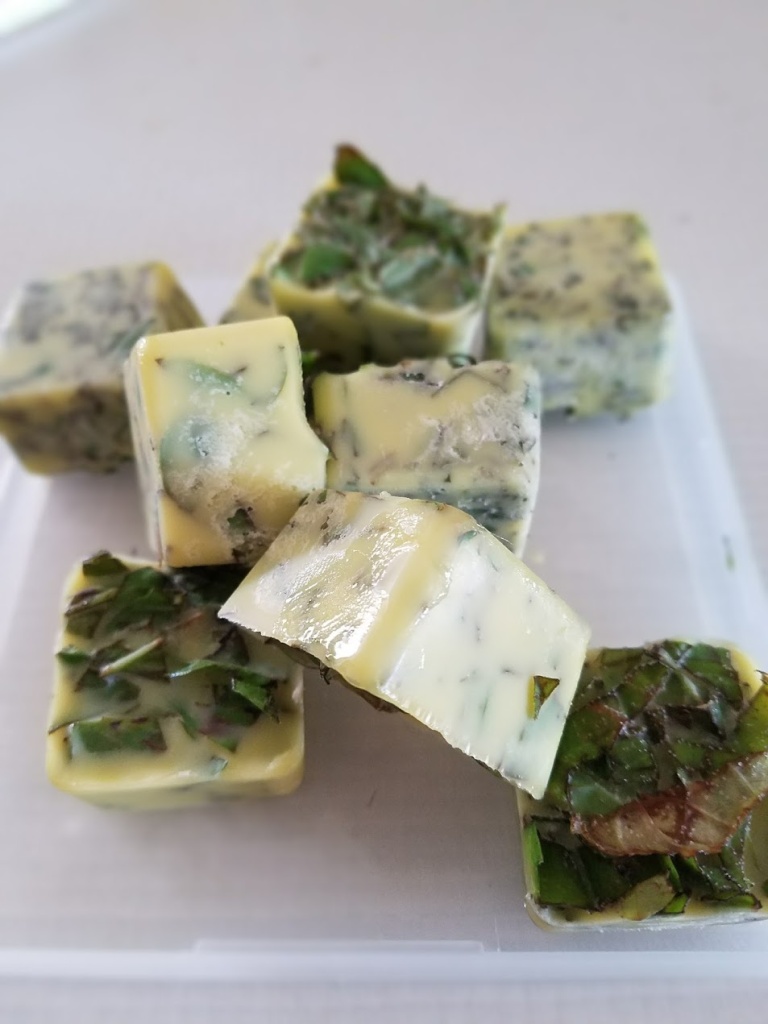
Basil and Olive Oil our of the freezer
Basil cubes bagged and dated to put back in the freezer
Herbs in Olive Oil
You can Freeze Herbs for cooking here’s how.
Here is a list of some of the more popular herbs that are good frozen in olive oil.
Thyme
Oregano
Peppermint
Sage
Rosemary
Fennel
Basil
You will need also
Ice tray
Plastic wrap
Extra Virgin Olive Oil
Wash all the herbs. Chop the herbs up separately into small pieces and fill the ice cube tray with the herbs. Fill the ice cube tray with Extra Virgin Olive Oil and cover it with plastic, then freeze.
When the herbs are frozen place them in a zip lock bag or a plastic container if you have room in the freezer. Label the bag with what herb and what day you froze the herbs. Next time you want some fresh herbs you just take out a cube and drop it into your recipe. You can put the cubes in stews, purees, soups, or you can spread them on a slice of bread for your breakfast.
Olive Oil can be frozen. When you use it out of the freezer it must be that day you thawed it. If you do not it is no longer edible or even healthy.
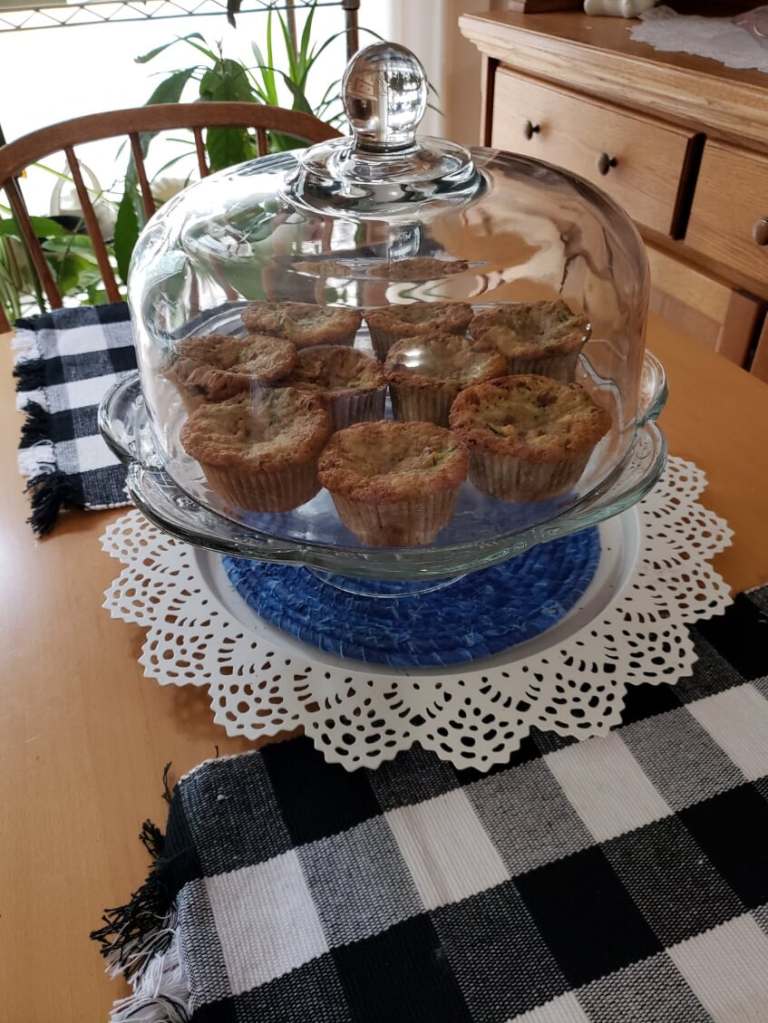
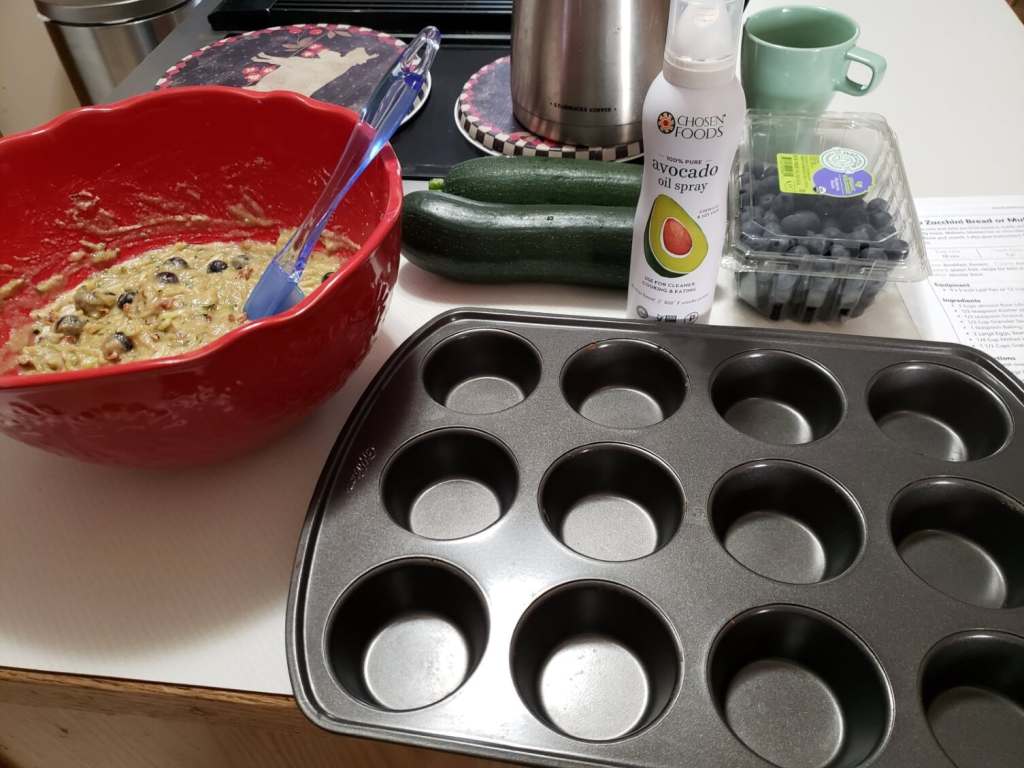
With all this gardening that I am doing, I am so encouraged to cook healthier food for myself and my family. I tried this recipe that I found at “ruled.me” . The one thing that I did not do was to drain the zucchini before baking. I do recommend this part of the process. I also had to make a few adjustments because of the altitude and my oven does not cook evenly. I prefer to make muffins rather than bread. I also tried fresh blueberries in the muffins. It was far to moist but still tasted great.
Keto Zucchini Bread & Muffins
3 large eggs
½ cup olive oil
1 teaspoon vanilla extract
2 1/2 cups almond flour
1 1/2 cups erythritol (I did not have this so used regular sugar)
½ teaspoon salt
1 1/2 teaspoons baking powder
½ teaspoon nutmeg
1 teaspoon ground cinnamon
¼ teaspoon ground ginger (I did not have this either so I just did not use it)
1 cup grated zucchini
½ cup chopped walnuts ( I used pecans instead)
Preheat oven to 350°F. Whisk together the eggs, oil, and vanilla extract. Set to the side.
In another bowl, mix together the almond flour, erythritol, salt, baking powder, nutmeg, cinnamon, and ginger. Set to the side.
Using a cheesecloth or paper towel, take the zucchini and squeeze out the excess water. (This is an important step. It cuts down on the moisture in the muffins)
Then, whisk the zucchini into the bowl with the eggs.
Slowly add the dry ingredients into the egg mixture using a hand mixer until fully blended.
Lightly spray a 9×5 loaf pan, and spoon in the zucchini bread mixture. (I prefer muffins and do recommend that you use the paper cups for muffins)
Then, spoon in the chopped walnuts on top of the zucchini bread. Press walnuts into the batter using a spatula.
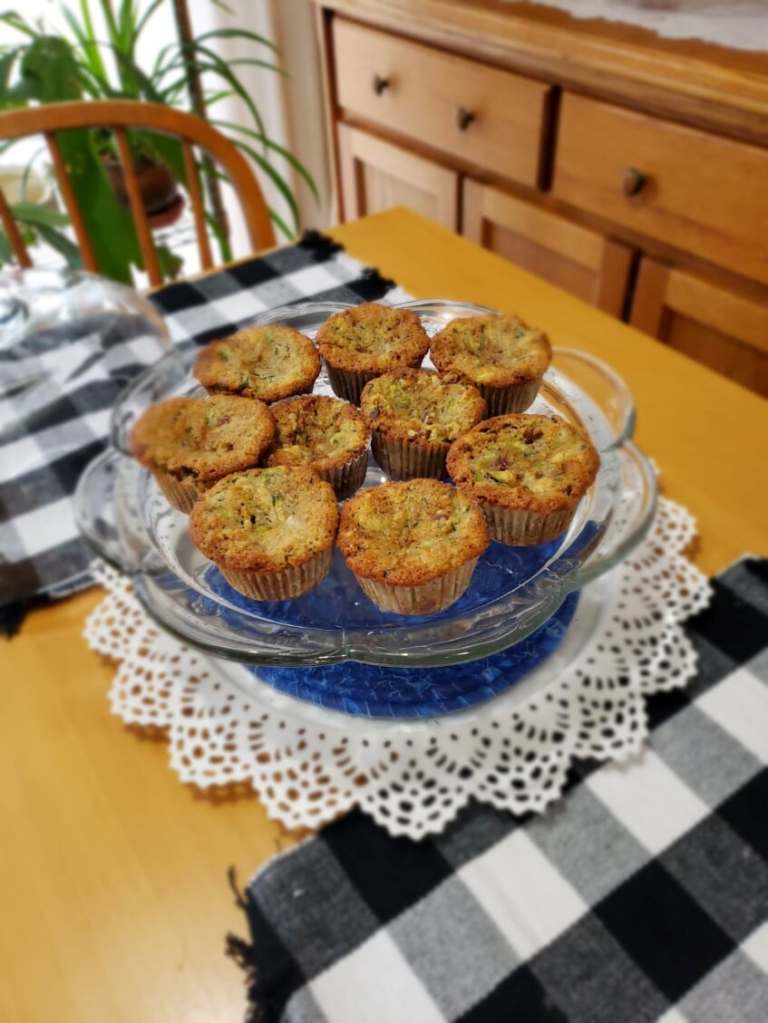
Bake for 60-70 minutes at 350°F or until the walnuts on top look browned. (I made muffins and the recommended was 20 minutes. I had to bake mine closer to 30.)
I loved the muffins and want to make up batches of them to freeze to have on hand.
Hope you enjoy all the information today. I wish you success on your garden and baking!