

This year has been one of the the strangest and most difficult years. COVID-19 is the biggest change, followed by 2 huge fires in my state. Since we were already required to wear masks it came in handy with all the smoke. Having so much going on that is beyond our control it has made life difficult. Many of us were laid off from jobs that we were counting on, and no new jobs to get. Unemployment you had to expect long waits to see if you could get on it. Next to hit us was the shortages of items at the grocery store. So many people do not plan for things and ran to the stores and started hording products. Hopefully this is not the future we have in store for us. All these changes will be with us for years to come. We are not out of the woods with the pandemic and to top everything off it is also an election year. Emotions are running high. Now with the holidays upon us I feel it is more important than ever for families to pull together and to celebrate the holidays in the best way we can.

Smoke from the Cameron Fire 
Snow in my yard 
Cleaning snow off the cars is such fun
Thinking outside the box my daughters and I have come up with an idea. Since we cannot be together we are going to do a Halloween Movie night through Zoom. I went ahead and did all my Halloween decorations. I will share them with you and tutorials. We created a list of movies we want to watch. The number one movie is Hocus Pocus. So I went on line to see what I could find. I found a website where I downloaded a pattern for a popcorn box with the drawings to the Sanderson Sisters on it. I also downloaded the pattern for doing a Hocus Pocus Bingo game that you will play while watching the movie. My next search was for food and drinks that were Hocus Pocus in theme and where I could not find it I went just Halloween.

The bingo cards and the popcorn box can be found at this website www.musingsofanaveragemom.com


Now on to the refreshments for the evening.

Traditional Samhain Cider & Wine 
Apple Nachos 
7 layer spider web taco dip 
Pentagram topped vegan apple pies 
Pretzel fingers 
Hocus Pocus Spell book Brownies
As part of getting ready for the Halloween movie night I started to decorate the house with a witches theme in mind. Here is what I have done so far. I continue to make things all the way till Halloween night.


The skeleton couple is done on the embroidery machine and the patterns can be found on Urban threads.(the male UT11759) (the female UT11764) I ended up having some puckering on these due to the volume of stitches. There is 72,000 stitches so if you choose to do this you will have to make sure you are using the proper amount of stabilizer. The fabric I chose was also a bit stretchy and I could not correct it enough with the density of the stitches. Either way I love how they turned out and will show them until I decide to make them again.


The next thing I did was the display of dead fairies. I got the idea from Pinterest. I bought the skeletons from the Dollar Store. The board to mount them I bought at Joann’s. The moss for the hair I had on hand but bought it from Hobby Lobby. The wings I hand drew one set and then made copies on my printer. The sign I hand drew as close to the fonts that I saw on the sample on Pinterest. I glued the fairies to the board but went back and used heavy duty straight pins to look like I had pinned the bodies and wings much like you would do with butterflies.


The skulls were fun to do I bought them at the dollar store. I did not like the color. They looked plastic and fake. I antiqued them with a wash of acrylic paint in the color of Expresso. I really like how they came out. Then I put glow in the dark glue in the eyes and they are very spooky at night. I did not seal the skulls but you could do that if you wish.
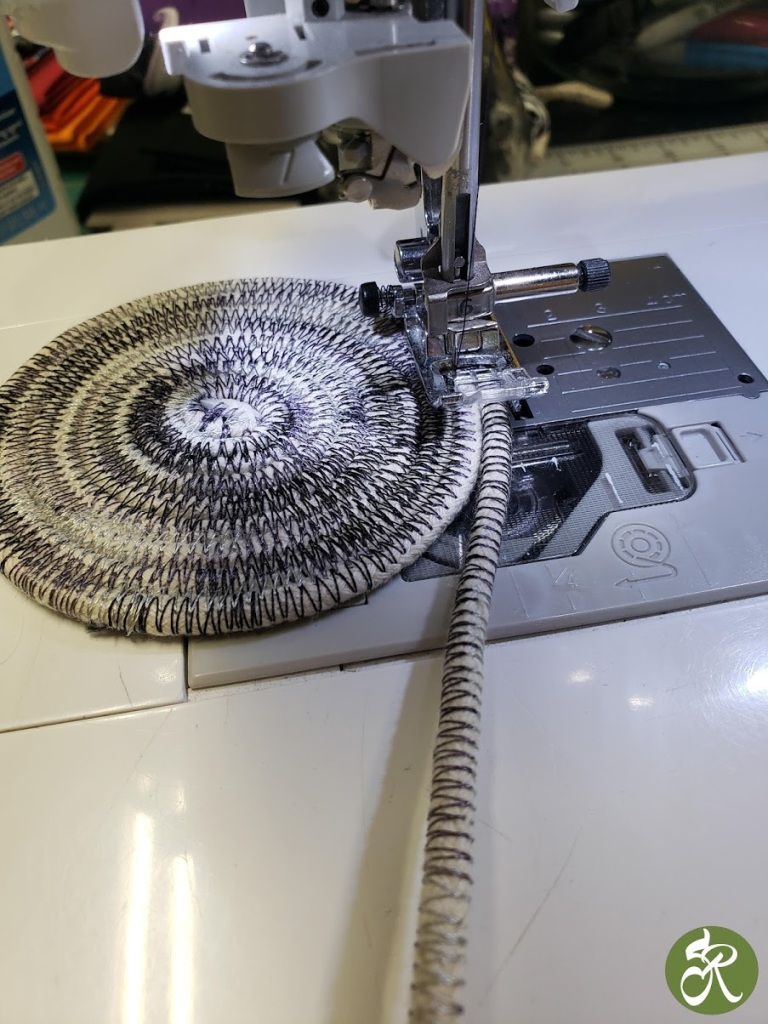
coiling the rope 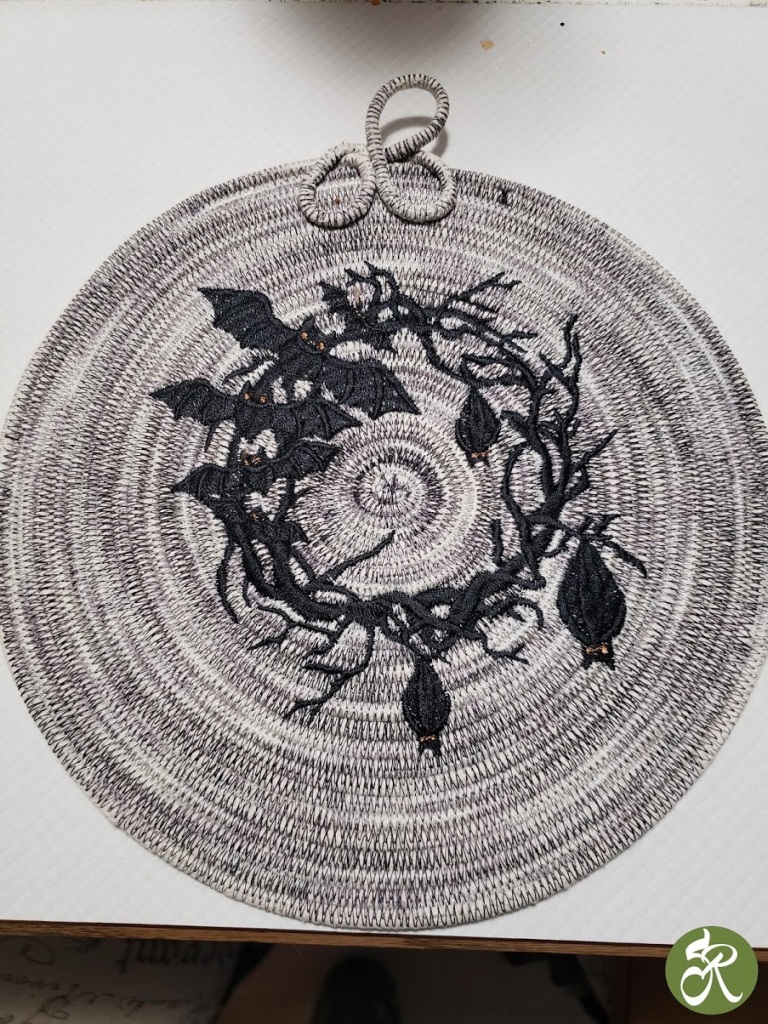
embroidered rope 
finished trivet


I get most of my candle sticks at Goodwill, Dollar Store and Arc. This trivet is made of rope sewn together. The stitch used is a zig zag stitch. On this trivet I first zigzaged around the rope before I stitched it together. I used a variegated black thread which gives it a umbra kind of look. The process of coiling the rope is actually pretty easy. To start the coil you do this in your hand until it is about 4″ in diameter and stick pins from the outside to the center. This will hold it in place so you can start stitching in the center and work your way out. What you are actually doing is zigzag stitching in between the rope in order to connect each round. It took me much longer to find a design I liked to embroider on the trivet. The pattern is from Embroidery Library. The pattern is called Bats in the Belfry Wreath. M8406. The patterns are for machine and hand embroidery.
The candle is a real candle that I had on hand. Real meaning it is not battery operated. To get the dripping effect what I did was use my glue gun and started at the bottom of the drip and go up. I wanted it to have a bigger bubble effect at the bottom. As you are using the glue gun the longer you hold the handle down for the glue to come out the thinner it gets. I did not paint the drips but if you wanted it to look scarier you could paint the drips red. The flowers I used I got at the Dollar Store. I chose not to clue them in place so I can use the candle holder at other times of the year.

The next thing that I made was the bottle of poison. I glued a skull head found at the Dollar Store on top of the bottle. I downloaded off the internet a poison bottle label. There are so many online to choose from. I used Mod Podge to attach the label to the front of the bottle. For the poison inside I used the green goop you can find at any store. It is the stuff kids like to play with. I wrapped jute around the neck of the bottle. Once I put this stuff inside the jar I sealed it with glue. I then antiqued the entire bottle to make it look really old. I did not seal the bottle when I was done. I plan to add more bottles as I find interesting bottles all year long.


For this one all I did was fill a jar I had on hand with small skulls. I got these skulls at Joanns.

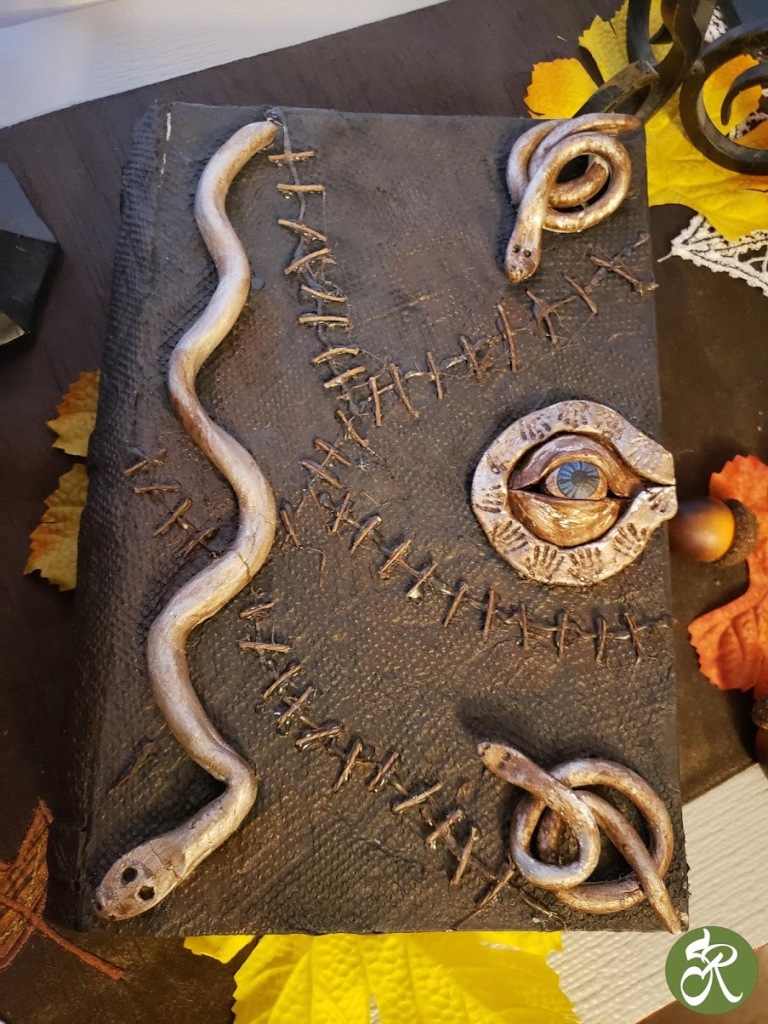
This project was a little time consuming but fun. I was using the magic book of spells from the movie Hocus Pocus to copy. I found a Paper Mache book at Michaels. I covered the book with ripped paper towels and Mod Podged them on. When I liked the look I painted the entire book black. To make the snakes and the eye I used air dry clay I got at Hobby Lobby. It worked but air dry clay has a tendency to crack once it dries. I let the snakes and eye part dry overnight and then painted them after I glued them to the book.
To accent the fact that I wanted it to look like the fabric was stitched together I drew a line with my glue gun. The stitches are made out of small broken sticks that I glued on. The little hand prints around the eye are made with the hand of small skeletons. I painted the sides that look like pages in a book. Once I was done I antiqued the whole book with a brown paint. I have jewelry inside that I have made.


For this piece I found a skeleton in one of the craft stores. I had another idea in mind when I bought it. This idea started out with the bird cage I found at a flea market. I debated about painting it black. I decided not to. I did not like how plastic the skeleton looked so I antiqued it with brown acrylic paint. I did not seal it. For the floor of the bird cage I laid down moss from the crafts stores that I had on hand. The skeleton looks a bit crowded in the tiny cage and that was on purpose. I may add small bats in there eventually. When I find something that inspires me. Most of my projects I add to them year after year.


For this project it is all machine embroidered. You embroider sections of it and in the end you stitch it all together. This is called free standing lace. The reason is that it is stitched on water soluble stabilizer. When you complete each section you wash away the stabilizer and all you have left is the threads. When you have all 8 pieces done you zig zag stitch them together to complete the circle. The pattern can be found on Embroidery Library it is pattern M8406 called Bats in the Belfry.


I hope you enjoy some of the ideas I came up with. I would love to see yours if you create it! Happy crafting. Next article I will focus on all the recipes that I used for the movie night.
Roxanne


